

In the compact urban landscapes of Toronto and Markham, every square foot of your kitchen is prime real estate. The common dream of a functional, stylish kitchen often clashes with the reality of limited space, leading many homeowners to believe that a kitchen island is an unattainable luxury. However, the opposite is true: a well-designed island is not just possible, but essential for maximising workflow, storage, and style in a smaller footprint. This guide is built to debunk that myth by diving deep into specific, actionable small kitchens with island ideas, proving that even the most modest layouts can accommodate this versatile centrepiece.
This is not a collection of generic advice. We will explore practical, real-world solutions that address the unique challenges of smaller Canadian homes. From mobile carts that offer flexibility to multi-functional peninsulas that seamlessly extend your counter space, our focus is on smart design that delivers tangible benefits. We'll detail everything from ideal dimensions and material insights featuring MapleKing cabinetry to local budgeting advice tailored for the GTA. To truly unlock your kitchen's potential, consider the array of available kitchen and dining room furniture that can enhance both form and function, especially in compact spaces.
This comprehensive roundup is your blueprint for transforming a cramped kitchen into a highly efficient and beautiful hub. Get ready to explore eight innovative concepts that will help you reclaim your space, improve your home's functionality, and finally achieve the kitchen you've always wanted, regardless of its size.
1. Portable Kitchen Island with Storage
For homeowners in Toronto and Markham where space is at a premium, a fixed kitchen island can often feel more like a hindrance than a help. This is where the portable kitchen island shines as a versatile solution. A portable or mobile island is a freestanding unit, often on casters or wheels, that provides extra counter space, storage, and functionality without the commitment of a permanent installation. This flexibility is its greatest asset in compact layouts.
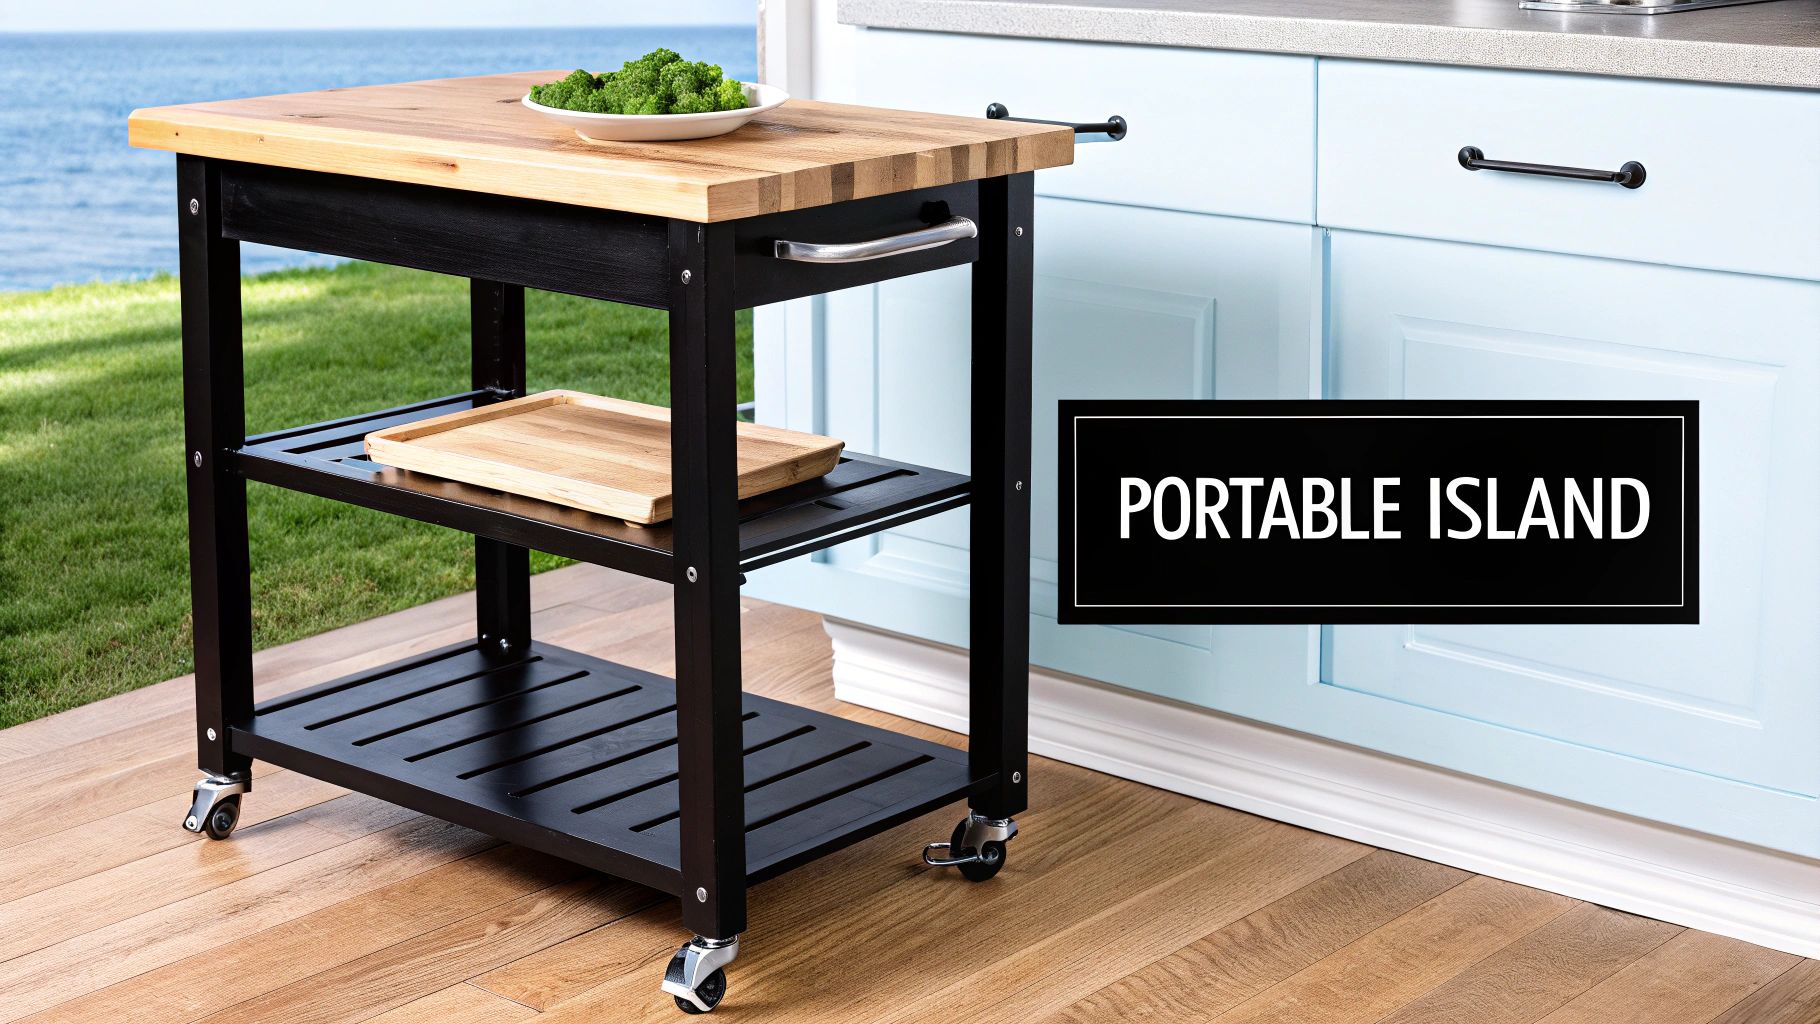
This approach is perfect for galley kitchens, L-shaped layouts, or any small kitchen where workflow patterns change daily. You can roll it into the centre of the room for meal prep, move it to the side to create an informal dining spot, or push it against a wall to open up the floor for entertaining. Its mobility ensures you never have to sacrifice precious square footage permanently.
Key Benefits and Implementation
A primary advantage is the added storage and work surface exactly where you need it. Many portable islands, like custom options from MapleKing, come equipped with drawers, shelves, or small cabinets, helping to declutter your main countertops. You can find ready-made examples at retailers like IKEA (STENSTORP series) or Williams-Sonoma, but a custom piece allows for perfect integration.
When choosing a portable island, consider these practical tips:
- Mobility and Safety: Opt for high-quality, locking casters that can handle a significant weight load (at least 135 kg or 300 lbs). This ensures the island remains stable during use and won't scratch your floors.
- Material Cohesion: Match the island to your existing kitchen. MapleKing offers custom mobile islands with durable, painted HDF finishes that can be colour-matched to your current cabinetry for a seamless, built-in look.
- Proper Clearance: To maintain a functional workflow, ensure you have at least 90 cm (36 inches) of clearance on all sides when the island is in its primary position.
- Strategic Placement: When not in active use, tuck the island against an unused wall to maximize open floor space and maintain clear pathways through the kitchen.
For those considering a more permanent but still space-conscious solution, exploring different cabinets for a kitchen island can provide inspiration for both mobile and fixed designs. A portable island serves as an excellent, low-commitment starting point for introducing an island into your small kitchen.
2. Slim Multi-Function Island with Seating
In many Greater Toronto Area condos and townhouses, a conventional kitchen island is simply too wide, creating choke points and disrupting workflow. The slim, multi-function island is an elegant solution, specifically designed to fit these tighter spaces. Typically measuring just 45 to 60 cm (18 to 24 inches) wide, this design provides a valuable prep surface and casual seating hub without overwhelming the limited kitchen footprint.
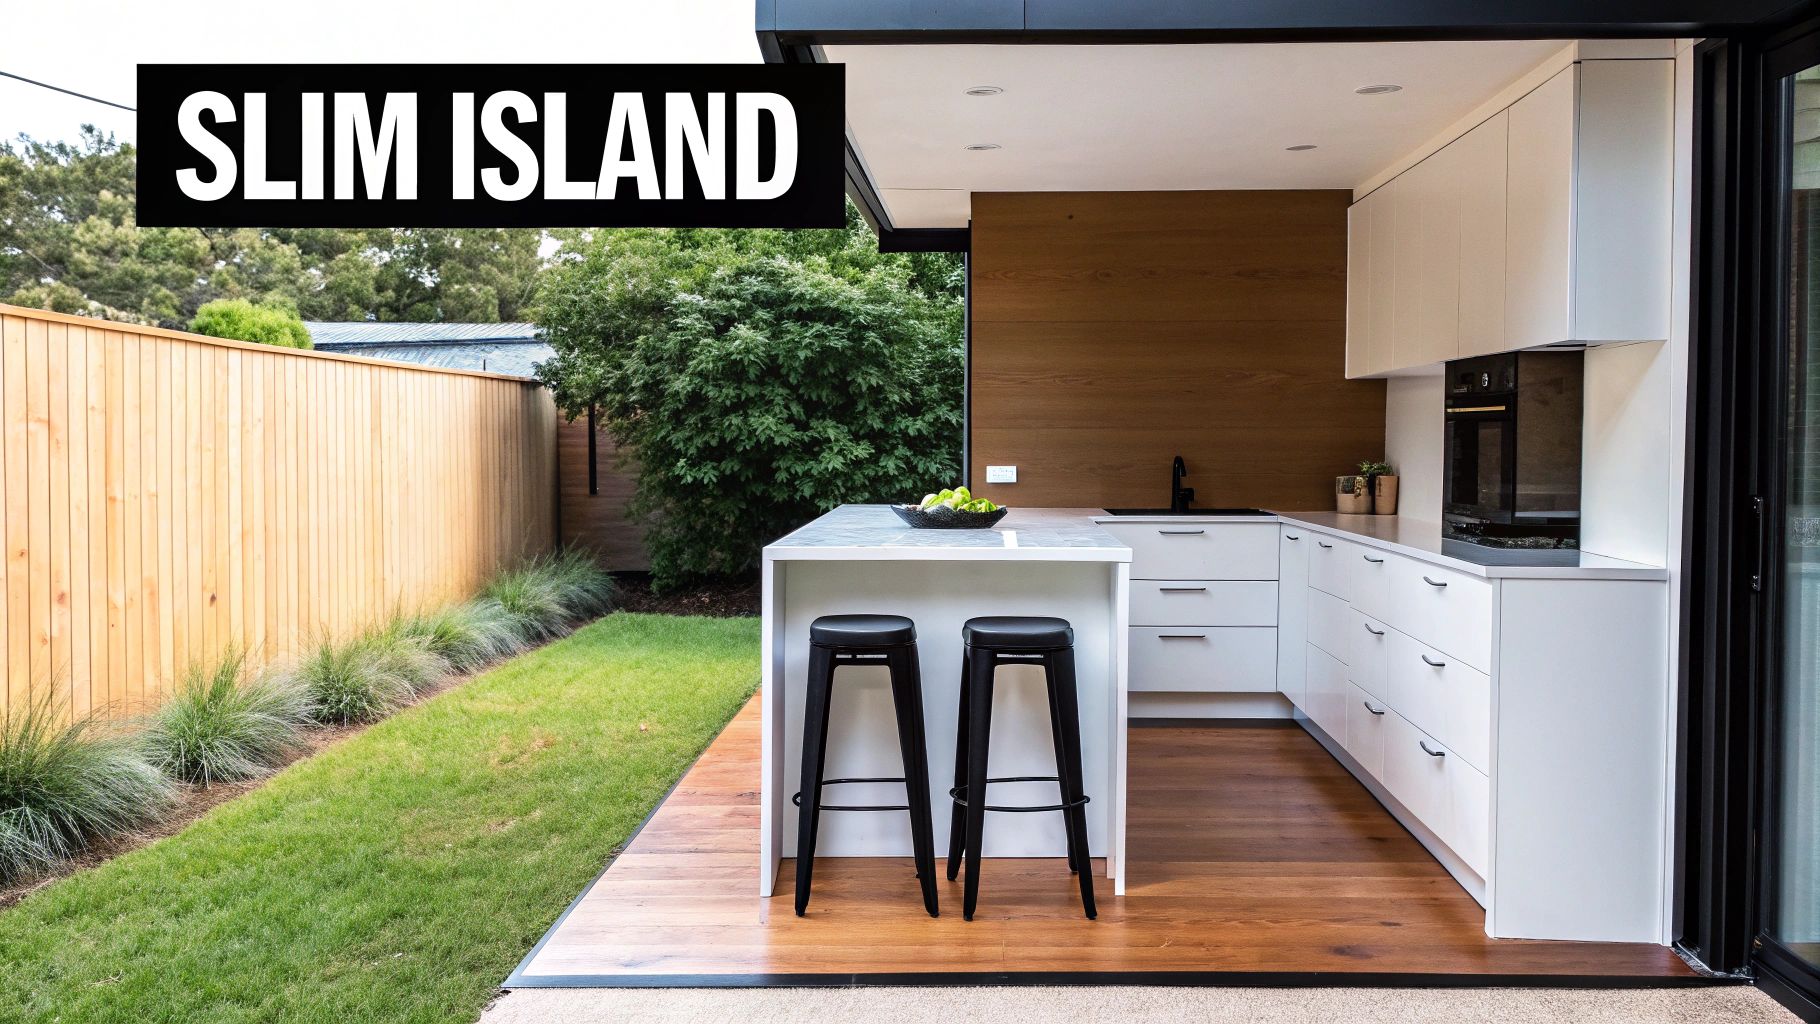
This narrow profile is ideal for galley kitchens or open-concept living areas where every centimetre counts. By integrating seating on one side and functional storage below, it transforms a simple walkway into a dynamic zone for morning coffee, homework sessions, or guest interaction during meal prep. Its clever design makes it one of the most practical small kitchens with island ideas for modern urban living.
Key Benefits and Implementation
The main advantage of a slim island is its ability to introduce functionality without sacrificing essential clearance. It adds counter space and dining capacity while maintaining a clear, navigable path through the kitchen. Custom installations, like those seen in Markham townhouses featuring MapleKing’s matte HDF finishes, demonstrate how a slim island can be tailored to a specific layout for a seamless, built-in appearance.
When planning for a slim multi-function island, consider these tips:
- Sufficient Knee Room: To ensure comfortable seating, design a countertop overhang of at least 30 to 38 cm (12 to 15 inches). This provides adequate legroom for anyone using the bar stools.
- Maintain Clear Pathways: A non-negotiable rule is to keep a minimum of 90 cm (36 inches) of clearance between the island and surrounding cabinetry or walls. This ensures safe and efficient movement.
- Smart Storage Solutions: With limited cabinet depth, maximizing interior space is crucial. Use drawer organizers, pull-out spice racks, and vertical dividers to make the most of every inch of storage.
- Visual Contrast and Lightness: Create a designer look by choosing a contrasting finish. For example, pair a high-gloss white island with darker matte cabinet doors. Consider adding open shelving on one end to create visual lightness and prevent the island from feeling too blocky.
- Durable Materials: Since this island will serve as both a work surface and a dining table, select durable, easy-to-clean materials. Laminate and painted HDF finishes are excellent choices, offering resistance to spills and daily wear.
3. Open Shelving Island Design
In modern Toronto lofts and compact Markham homes, a bulky, cabinet-heavy island can overwhelm a small kitchen, making it feel cramped and visually cluttered. The open shelving island design offers a minimalist and airy alternative. Instead of solid cabinetry, this island style uses open shelves to create a sense of spaciousness, allowing light and sightlines to pass through, which visually enlarges the room. It’s an ideal solution for those seeking both function and a curated, stylish aesthetic.
This approach turns everyday items like dishware, cookbooks, and glassware into decorative elements. It encourages a tidy, organised space while keeping frequently used items easily accessible. The design is highly adaptable, fitting well with industrial-inspired aesthetics seen in retailers like CB2 or the clean, minimalist designs from brands like Rejuvenation. It’s a perfect fit for small kitchens where every design choice must maximize both utility and visual appeal.
Key Benefits and Implementation
The primary benefit of an open shelving island is the illusion of space it creates. By eliminating the visual weight of solid cabinet doors, the kitchen feels more open and less confined. This design also promotes organisation, as displayed items must be kept neat. For a cohesive look, the frame of the island can be built using materials that match your existing cabinetry, creating a seamless transition.
When incorporating an open shelving island, consider these practical tips:
- Curated Display: To avoid a cluttered look, limit the items on display. A good rule is to keep 8-12 carefully selected, coordinated pieces per shelf, such as matching dishware or a collection of glassware.
- Aesthetic Cohesion: Create a frame for your open shelves using materials like MapleKing’s durable HDF or real wood painted finishes. This allows you to colour-match the island structure to your main cabinets for a polished, integrated look.
- Strategic Lighting: Install under-shelf LED strip lighting to add depth and ambience. This not only highlights your displayed items but also provides soft, functional task lighting.
- Hybrid Approach: For the best of both worlds, consider a hybrid design. Incorporate one or two small closed cabinet sections to hide away less attractive items like small appliances or cleaning supplies, while keeping the rest of the island open.
- Structural Integrity: Ensure all shelves are professionally installed, properly anchored, and rated to handle the weight of heavy items like ceramic dishes or cast-iron cookware.
For those drawn to the warmth and texture of natural materials, exploring different wood island kitchen designs can provide further inspiration on how to beautifully integrate open shelving. This approach is one of the most effective small kitchens with island ideas for creating a functional and stylish focal point.
4. L-Shaped or U-Shaped Compact Island
When standard rectangular islands don't fit the unique footprint of a small kitchen, an L-shaped or U-shaped compact island offers a clever, space-maximizing alternative. This design wraps around a corner or extends into the room, creating a peninsula-like structure that significantly increases counter space and storage without demanding a large central footprint. This approach is particularly effective for Toronto and Markham homes with unconventional or awkward kitchen layouts.
The angled design is ideal for establishing distinct zones for cooking, prep, and dining, all within one cohesive unit. For instance, one leg of the 'L' can serve as a primary food preparation surface, while the other functions as a breakfast bar with seating. This configuration excels in open-concept condo spaces where it can act as a subtle divider between the kitchen and living areas, defining the space functionally and aesthetically.
Key Benefits and Implementation
The main advantage of an L- or U-shaped island is its efficiency in utilizing corner or oddly-shaped spaces that might otherwise go to waste. Custom cabinetry is key to making this design work seamlessly. A bespoke solution from MapleKing allows for precise dimensions, ensuring the island integrates perfectly with your kitchen's existing flow and perimeter, a common challenge in Markham townhouses and heritage Toronto homes.
When planning for a shaped island, consider these essential tips:
- Precise Measurements: Before committing to a design, take exact measurements of your kitchen. A custom design consultation, like the free quotations offered by MapleKing, is crucial to ensure the final piece fits perfectly and maintains necessary clearances.
- Maintain Traffic Flow: Proper clearance is non-negotiable. Plan for at least 90-100 cm (36-40 inches) of open pathway around the island to avoid creating bottlenecks and ensure safe movement.
- Visual Cohesion: To prevent the island from overwhelming the room, choose a single, unified finish. A matte or high-gloss HDF finish from MapleKing can be colour-matched to your existing cabinets, creating a harmonious and expansive look.
- Smart Storage Integration: Maximize the unique shape by integrating storage into the interior angle. Pull-out corner cabinets or open shelving can make these typically hard-to-reach spots highly functional.
- Safety and Comfort: Opt for rounded corners on the countertop to improve traffic flow and prevent sharp edges, a critical safety feature in a compact space. Ensure any seating overhang provides adequate knee space (at least 30 cm or 12 inches).
This type of island is more than just a piece of furniture; it's an architectural element that reshapes your kitchen's functionality. For more inspiration on how to arrange your space, exploring different kitchen cabinet layout ideas can help you visualize how a custom-shaped island might fit.
5. Peninsula-Style Attached Island
For many compact kitchens, especially in Toronto condos or Markham townhouses, a fully freestanding island is simply not feasible. The peninsula-style attached island offers a brilliant compromise, providing many of the benefits of an island without demanding the same amount of floor space. This hybrid design is an extension of an existing counter or wall, creating a semi-island configuration that defines the kitchen area and adds functionality.
This setup is one of the most effective small kitchens with island ideas because it preserves an open feel while maximizing utility. It works exceptionally well in L-shaped or U-shaped layouts, where it can close off the kitchen slightly to create a more defined workspace. By attaching to a wall or counter, it eliminates the need for clearance on one side, saving critical circulation space that a traditional island would consume.
Key Benefits and Implementation
A peninsula excels at adding a casual dining spot, extra prep surface, and a natural boundary between the kitchen and an adjacent living or dining area. This makes it ideal for open-concept layouts where a visual separator is needed. It can also house additional storage or even small appliances, further decluttering the main kitchen zone.
When planning for a peninsula, consider these practical tips:
- Proper Clearance and Workflow: To avoid creating a bottleneck, ensure a minimum of 90 to 100 cm (36-40 inches) of clearance between the peninsula's edge and any opposing cabinets or walls. This maintains a comfortable and safe pathway.
- Seamless Integration: For a cohesive, built-in look, match the peninsula to your existing kitchen. MapleKing offers custom peninsula cabinets with durable, painted HDF finishes that can be perfectly colour-matched to your current cabinetry.
- Structural Support: If the countertop overhang for seating extends more than 25 cm (10 inches), it requires proper support. Use discreet steel brackets or a decorative support leg to ensure stability and safety.
- Functional Design: Maximize the peninsula's utility. Consider installing cabinets on the kitchen side for storage and open shelving on the living area side for displaying decor, turning it into a stylish and practical feature.
6. Compact Rolling Cart Island
For the most space-conscious Toronto kitchens, particularly in rental condos or micro-apartments, even a small, dedicated island can feel too permanent. The compact rolling cart island offers a hyper-flexible and affordable solution. This approach utilizes a lightweight utility cart, often with multiple tiers, to serve as a mobile prep station, storage hub, and serving trolley, all while occupying a minimal footprint.
This idea is perfect for those who need occasional extra counter space without committing to furniture. Its true advantage is its versatility; it can be a coffee bar in the morning, a prep area for dinner, and then rolled away into a pantry or corner when not in use. Models like the IKEA RÅSKOG cart have become popular for this very reason, offering a stylish yet practical take on small kitchens with island ideas.
Key Benefits and Implementation
The primary benefit of a rolling cart is its ability to add function without sacrificing any permanent floor space. It’s an accessible, low-cost entry point to adding an "island" that requires no installation. These carts provide vertical storage, perfect for keeping frequently used oils, spices, or small appliances within arm's reach but off your primary counters.
When incorporating a compact rolling cart, consider these tips:
- Enhance the Work Surface: Many utility carts have slatted or mesh shelves. To create a stable cutting or prep surface, add a custom-cut piece of butcher block or durable laminate to the top tier.
- Prioritize Safety and Stability: Always choose a cart with high-quality, locking wheels to keep it stationary during use. If placed in a high-traffic area, consider using small safety brackets to secure it to a wall when parked.
- Organize for Efficiency: Arrange items based on use. Place daily essentials like cooking oil and salt on the top tier, less-used items on the middle, and heavier items like potatoes or onions on the bottom for a low centre of gravity.
- Integrate Aesthetically: Don't let the cart look like an afterthought. Choose a colour that complements your kitchen's palette or use spray paint to customize a basic metal cart for a more integrated appearance.
7. Kitchen Island with Integrated Appliances
For homeowners in Toronto seeking the pinnacle of efficiency and a sleek, modern aesthetic, integrating appliances directly into the kitchen island is a transformative strategy. This approach consolidates key kitchen functions like cooking, cleaning, and preparation into a single, centralized hub. By incorporating a cooktop, sink, or dishwasher drawer into the island, you eliminate the need for separate appliance zones, freeing up valuable wall and counter space in a compact kitchen layout.
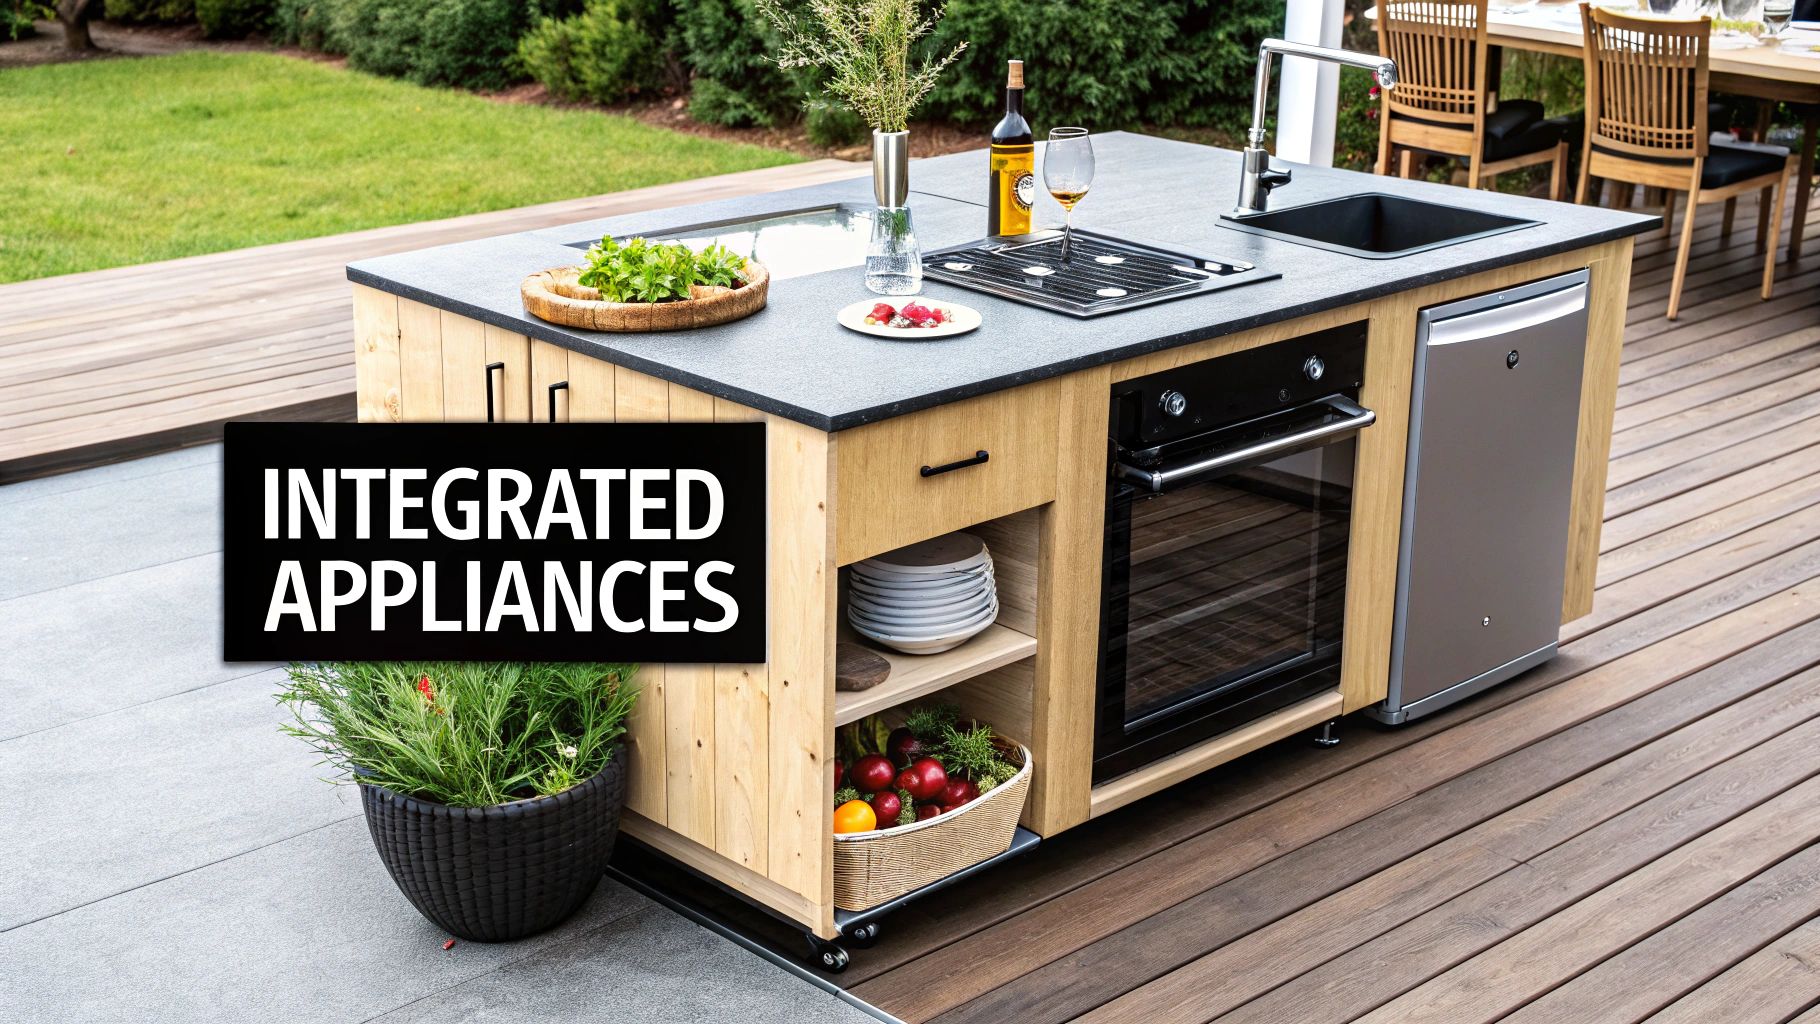
This design is particularly effective in high-end condo renovations and custom home builds where creating a professional-grade, integrated kitchen ecosystem is a priority. It creates a highly efficient work triangle and a social cooking environment where the host can engage with guests while preparing a meal. This solution turns the island from a simple counter into the functional heart of the kitchen, embodying one of the most sophisticated small kitchens with island ideas.
Key Benefits and Implementation
The primary benefit of an integrated island is the immense gain in workflow efficiency and space optimization. Placing a cooktop on the island, for example, allows for a more open and social cooking experience, while a prep sink makes washing vegetables and cleaning up a seamless part of the meal preparation process. Leading brands like Wolf, Sub-Zero, and Miele offer compact, high-performance appliances designed specifically for island integration.
When planning for an island with integrated appliances, consider these essential factors:
- Professional Planning: Consult with an architect or certified kitchen designer. They will ensure your layout meets Toronto and Markham building codes, including requirements for electrical, plumbing, and ventilation.
- Ventilation is Key: For an island cooktop, a powerful, commercial-grade overhead hood or downdraft system is crucial to manage smoke, steam, and cooking odours effectively in a smaller space.
- Utility Requirements: Verify that your home can support the necessary infrastructure. Most cooktops require a dedicated 240V electrical circuit, and plumbing for a sink or dishwasher must be carefully planned to minimize complexity under the island.
- Durable Surfaces: Choose a countertop material that can withstand high heat and frequent use. Engineered quartz and granite are excellent choices; avoid laminate, which can be damaged by hot pans.
- Safe Clearance: Ensure a minimum clearance of 107-122 cm (42-48 inches) around the island to provide a safe working area for the cook and prevent accidents.
When designing your kitchen island with integrated features, selecting high-quality, energy-efficient appliances is a smart choice for long-term savings and environmental impact. You can explore options for these appliances by referring to resources on the best energy-efficient appliances.
8. Wall-Mounted or Folding Countertop Island Extension
For the most compact urban spaces, like micro-condos in Toronto where a traditional island is simply not feasible, the wall-mounted or folding countertop extension offers an ingenious solution. This concept involves a countertop surface attached to a wall with heavy-duty hinges, allowing it to be folded down when needed and tucked away completely when not in use. It provides a temporary island-like workspace or dining surface without consuming any permanent floor space.
This "Murphy bed" approach to kitchen design is the ultimate space-saver for galley kitchens or open-concept studios. It can function as a prep area, a breakfast bar, or even a small home office nook. When folded up, it lies flat against the wall, often concealed as a decorative panel, preserving the room’s open feel and clearing pathways for everyday movement. It’s one of the most dynamic small kitchens with island ideas for maximizing utility in minimal square footage.
Key Benefits and Implementation
The primary advantage is gaining a functional surface on demand without any permanent footprint. This design frees up valuable floor space that would otherwise be dedicated to a fixed island. Leading European compact kitchen systems often feature these designs, and you can see custom DIY installations in many downtown Toronto condos where maximizing every centimetre is critical.
When planning for a folding island extension, consider these essential tips:
- Structural Support: This is non-negotiable. The unit must be mounted directly into wall studs or a reinforced structural brace, never just drywall. The weight of the countertop and its intended load demand a secure anchor.
- Hardware is Key: Use heavy-duty, commercial-grade hinges and a sturdy, locking support leg that deploys when the surface is extended. This ensures stability and safety, preventing collapse during use.
- Durable Materials: Choose a lightweight yet durable surface material. A custom-finished piece from MapleKing using durable HDF or laminate can be colour-matched to your cabinetry and is engineered to withstand repeated handling.
- Practical Dimensions: Design the extension to match your standard counter height (typically 90 cm or 36 inches) for a seamless and ergonomic workspace. Ensure it folds away without obstructing nearby drawers or appliance doors.
- Weight Limitations: Be mindful of the unit's capacity. A well-built system with a proper support leg can typically handle 35-45 kg (75-100 lbs), making it suitable for meal prep and casual dining but not for heavy appliances.
8 Small-Kitchen Island Ideas Compared
| Option | Complexity 🔄 | Resources & Installation ⚡ | Expected Outcomes 📊 | Ideal Use Cases 💡 | Key Advantages ⭐ |
|---|---|---|---|---|---|
| Portable Kitchen Island with Storage | Low — no structural work; simple assembly | Minimal — movable, no plumbing/electrical; quality casters & durable top | Extra workspace and storage; flexible layout; moderate stability | Rentals, condos, small renovations | Flexible positioning, affordable, no permanent changes |
| Slim Multi-Function Island with Seating | Medium — precise measurements and fit required | Moderate — custom finishes, seating overhangs; careful install | Combines prep + casual dining; saves floor space; limited prep area | Condo kitchens, townhouses, real-estate flips | Space-efficient multifunction element; adds resale value |
| Open Shelving Island Design | Low–Medium — straightforward construction but needs secure anchoring | Low — fewer materials than closed cabinetry; shelving hardware | Visual openness, quick access, reduced hidden storage | Design-conscious homes, show homes, staging | Airy aesthetic, cost-effective, immediate accessibility |
| L-Shaped or U-Shaped Compact Island | High — complex custom design and precise measurements | High — more materials, labor, possible permits and structural work | Maximizes workspace and storage; creates multiple zones; may have dead corners | Kitchen renovations, custom builds, awkward layouts | Maximizes usable surface; adapts to irregular kitchens |
| Peninsula-Style Attached Island | Medium — simpler than freestanding but fixed in place | Moderate — attaches to existing cabinets/wall; may reuse infrastructure | Adds workspace and seating while preserving traffic flow | Very small condos, galley kitchens, budget renovations | Small footprint, easier install, cost-effective integration |
| Compact Rolling Cart Island | Low — lightweight, minimal assembly | Minimal — low-cost, portable; limited weight capacity | Temporary workspace; highly portable; limited storage | Renters, temporary solutions, micro kitchens | Ultra-portable, inexpensive, easily stowed away |
| Kitchen Island with Integrated Appliances | Very High — requires plumbing, electrical, ventilation & permits | Very High — professional trades, robust materials, ventilation systems | Centralizes cooking/clean-up, luxury look, significant value increase | Luxury renovations, custom homes, serious home cooks | High efficiency, premium functionality, boosts property value |
| Wall-Mounted or Folding Countertop Extension | Medium — needs strong anchoring and quality hardware | Low–Moderate — heavy-duty hinges/supports and durable finishes | On-demand workspace/dining that tucks away; limited load capacity | Micro-condos, studio apartments, galley kitchens | Virtually zero footprint when stored, affordable, space-saving convenience |
Your Next Step: From Inspired Ideas to a Functional Reality
Navigating the world of small kitchens with island ideas can feel like solving a complex puzzle, but as we've demonstrated, the right solution exists for every unique space. The challenge of a compact kitchen isn't a limitation; it's an opportunity for innovative design. The central theme connecting every idea, from the nimble rolling cart to the integrated L-shaped configuration, is the principle of multifunctionality. Your small kitchen island should never be just one thing. It's a prep station, a dining table, a storage hub, and a central gathering point all in one.
This journey has armed you with a diverse toolkit of concepts. We've moved beyond generic advice to explore precise, actionable strategies. You now understand that a slim island measuring just 60 cm wide can offer both seating and storage, and that a peninsula-style extension can delineate your kitchen space in an open-concept condo without consuming valuable floor area. The key is to stop thinking about what you can't fit and start focusing on what you can achieve with clever, purpose-built design.
Synthesizing Inspiration into a Practical Plan
The most critical takeaway is that successful small kitchen design hinges on a clear understanding of your personal workflow and priorities. Before you fall in love with a specific look, take a moment for a practical assessment of your own needs.
- Prioritise Your Primary Function: Are you desperate for more counter space for chopping and prep? Or is your main goal to create a casual spot for breakfast and coffee? Your answer will guide whether you opt for a butcher block top or an island with an overhang for seating.
- Measure with Precision: Don't just estimate. Use painter's tape to mark out the potential footprint of an island on your floor. Walk around it. Open your fridge and oven doors. This simple act provides a real-world feel for traffic flow and helps you visualise the crucial 90 to 110 cm clearance needed for a functional work triangle.
- Embrace Customisation: Off-the-shelf solutions can work, but a custom or semi-custom approach unlocks the full potential of your space. As we've seen, integrating appliances, designing custom-depth cabinetry, or creating a unique shape to fit an awkward corner are the game-changers that transform a good kitchen into a great one.
Mastering these concepts allows you to move from being a passive reader to an active participant in your home's transformation. It empowers you to have more informed conversations with designers and contractors in the Toronto and Markham area. You can now confidently discuss the merits of open shelving versus deep drawers, or articulate why a waterfall countertop might be the perfect finishing touch for your modern aesthetic.
Making Your Vision a Reality
The journey from a page of ideas to a beautifully installed kitchen island is a process of refinement. It involves balancing your budget, which as we noted can range from a few hundred dollars for a portable cart to several thousand for a custom-built unit, with your aesthetic and functional goals. Remember that the island is often the centrepiece of the kitchen; investing in quality materials and thoughtful design pays dividends in both home value and daily enjoyment.
Ultimately, the perfect island for your small kitchen is the one that simplifies your life, enhances your home’s beauty, and makes you love your space more. It’s about creating a hardworking centrepoint that feels intentional, not like an afterthought. With the right planning and a clear vision, you can implement one of these small kitchens with island ideas and create a space that is as practical as it is inspiring.
Ready to bring your vision to life with cabinetry that maximises every square centimetre? MapleKing Kitchen Cabinets specialises in providing high-quality, factory-direct cabinets perfect for creating custom islands and space-saving solutions in the Toronto and Markham area. Explore our versatile styles and get a free quote to see how affordable your dream kitchen can be at MapleKing Kitchen Cabinets.



