

A successful small kitchen renovation all comes down to solid planning and a realistic budget. Before you even think about swinging a hammer, getting a clear strategy on paper is the single most important thing you can do. It’s what separates a beautiful, functional space from a project filled with costly mistakes and regrets, especially here in Toronto.
Laying the Groundwork for a Seamless Renovation
Taking on a kitchen reno in a place like Toronto or Markham can feel like a massive undertaking. Let's be honest, the number of decisions can be dizzying. But a good plan is your roadmap, guiding every choice and turning a stressful process into something you can actually get excited about. The best projects aren't just about shiny new appliances; they're about completely rethinking how you live in that space.
The very first thing you need to do is figure out your 'why.' What is driving you crazy about your current kitchen? Is it the constant fight for a sliver of counter space? The frustrating lack of storage? Or is the whole look just tired and uninspiring? Nailing down these pain points is key—it helps you focus on what truly matters and stops you from getting distracted by trendy ideas that won't actually solve your problems.
Defining Your Renovation Goals
Before you fall down the Pinterest rabbit hole, get really specific about what you need this new kitchen to do for you. Having clear goals will be your north star for every decision that follows.
- Improve Functionality: Are you tired of the awkward dance between the sink, stove, and fridge? Maybe you're dreaming of a small breakfast bar for your morning coffee or just want smarter storage.
- Increase Storage Space: This is almost always the number one goal for a small kitchen. You might be aiming for a floor-to-ceiling pantry, using that forgotten vertical space with taller upper cabinets, or finally getting those pull-out organizers you've been eyeing.
- Enhance Aesthetics: Do you want a brighter, more open feel? Your goal could be a clean, modern look with flat-panel cabinets or something cozier and more traditional with classic Shaker doors.
- Boost Property Value: For many homeowners, the return on investment is a major driver. A thoughtfully designed kitchen renovation consistently delivers one of the highest returns of any home improvement project.
Establishing a Realistic Budget
Picking a budget number out of thin air just doesn't work. You have to understand where the money is actually going. Renovation costs in the Greater Toronto Area can be all over the map, so doing your homework is crucial. As you start this journey, a comprehensive guide to small kitchen renovations on a budget can offer some great insights for planning, even if it's based in another market.
A good rule of thumb is to set aside 10-15% of your home's total value for a kitchen renovation. You can adjust this for a smaller kitchen, but it’s a realistic place to start your calculations.
Now, let's break that number down so you can see where your money is going. A typical split looks something like this:
- Cabinetry and Hardware: 30-35%
- Labour and Installation: 15-20%
- Appliances: 10-15%
- Countertops: 10%
- Flooring: 5-7%
- Lighting and Electrical: 5%
- Plumbing: 5%
- Contingency Fund: 10-15% (Trust me, don't skip this!)
That contingency fund is your safety net. It's for the surprises you will find behind the walls—like old plumbing that needs an update—or for that last-minute countertop upgrade you decide you can't live without. Planning for it from day one saves a world of financial stress later. For a deeper dive into managing costs, check out our complete guide to a Toronto kitchen renovation.
Gathering Inspiration and Creating a Vision
Okay, with the goals and budget sorted, you get to the fun part: gathering ideas. Look specifically for designs that work wonders in compact layouts. Notice how designers play with colour, light, and clever storage tricks to make a small room feel so much bigger.
Start a mood board—whether it's on Pinterest or a physical corkboard—and collect images of everything you love. Gather layouts, colour schemes, materials, and finishes that speak to you. This visual collection becomes an incredibly powerful tool for showing your contractor exactly what's in your head, making sure everyone is on the same page from start to finish.
Maximizing Your Small Kitchen Layout
When you’re working with a small kitchen, the layout isn't just one part of the design—it’s everything. I've seen homeowners spend a fortune on beautiful cabinets and countertops, only to end up with a space that feels cramped and frustrating. Getting the floor plan right from the very beginning is the secret to a kitchen that not only looks great but also works efficiently and adds real value to your home.
It all starts with a simple but non-negotiable step: measuring your space with absolute precision. Don't just guess or eyeball it. You need to pull out a tape measure and document everything to create a basic floor plan.
- Wall Dimensions: Measure the length of every single wall.
- Ceiling Height: Note the exact distance from the floor to the ceiling.
- Doors and Windows: Record the size and placement of all openings, making sure to include the trim.
- Fixed Elements: Mark the precise locations of plumbing lines, electrical outlets, and any unmovable features like support beams or bulkheads.
Think of this detailed map as your blueprint. It's what prevents costly mistakes down the line, like ordering cabinets that don't quite fit or realizing your new fridge blocks a doorway. Getting these numbers right ensures every inch is perfectly planned for.
Understanding Classic Small Kitchen Layouts
For most small kitchen renovations, you'll be working with one of a few tried-and-true layouts. Each one has its own set of pros and cons, and the best fit really depends on the unique shape of your room.
- The Galley Kitchen: This layout runs two parallel rows of cabinets, creating a central corridor. It’s incredibly efficient for the serious cook, keeping everything just a few steps away. The main challenge here is managing foot traffic, as it can feel tight if it’s a primary walkway through your home.
- The L-Shape Kitchen: By using two adjacent walls, an L-shape layout naturally opens up the floor space, often leaving room for a small dining table or even a compact island. It's wonderfully versatile and helps prevent traffic jams, which is why it's such a popular choice for open-concept condos in Toronto.
- The One-Wall Kitchen: This is the ultimate space-saver, perfect for studio apartments or basement suites. It lines up all your cabinets and appliances along a single wall. While it definitely limits counter space, its simplicity is unmatched for maximizing the feeling of openness.
If you want to dig deeper into these options, we have more detailed examples in our guide to kitchen cabinet layout ideas.
Rethinking the Kitchen Work Triangle
You've probably heard of the classic kitchen work triangle—the design principle connecting the sink, refrigerator, and stove. The whole idea is to create a clear, easy path between these three key zones to make cooking a breeze.
But in a compact kitchen, forcing a rigid triangle isn't always possible, or even practical. It’s better to think in terms of "work zones." The goal is still the same: creating an effortless flow. Can you move from rinsing vegetables at the sink, to chopping them on the counter, and then over to the stove without tripping over things? If the answer is yes, you've got a successful layout, triangle or not.
A small kitchen forces you to prioritize. Focus on creating an efficient workflow between your primary tasks—prep, cooking, and cleaning. An effective layout isn't about rigid rules but about making your daily routine easier.
Clever Design Strategies for Small Spaces
Once you've settled on a layout, it's time to bring in some design tricks that can make a small kitchen feel surprisingly spacious. These strategies go beyond the floor plan and play with the perception of space itself.
This decision tree helps visualize how to narrow down what's most important in your reno, whether you're desperate for more counter space, better storage, or just a modern look.
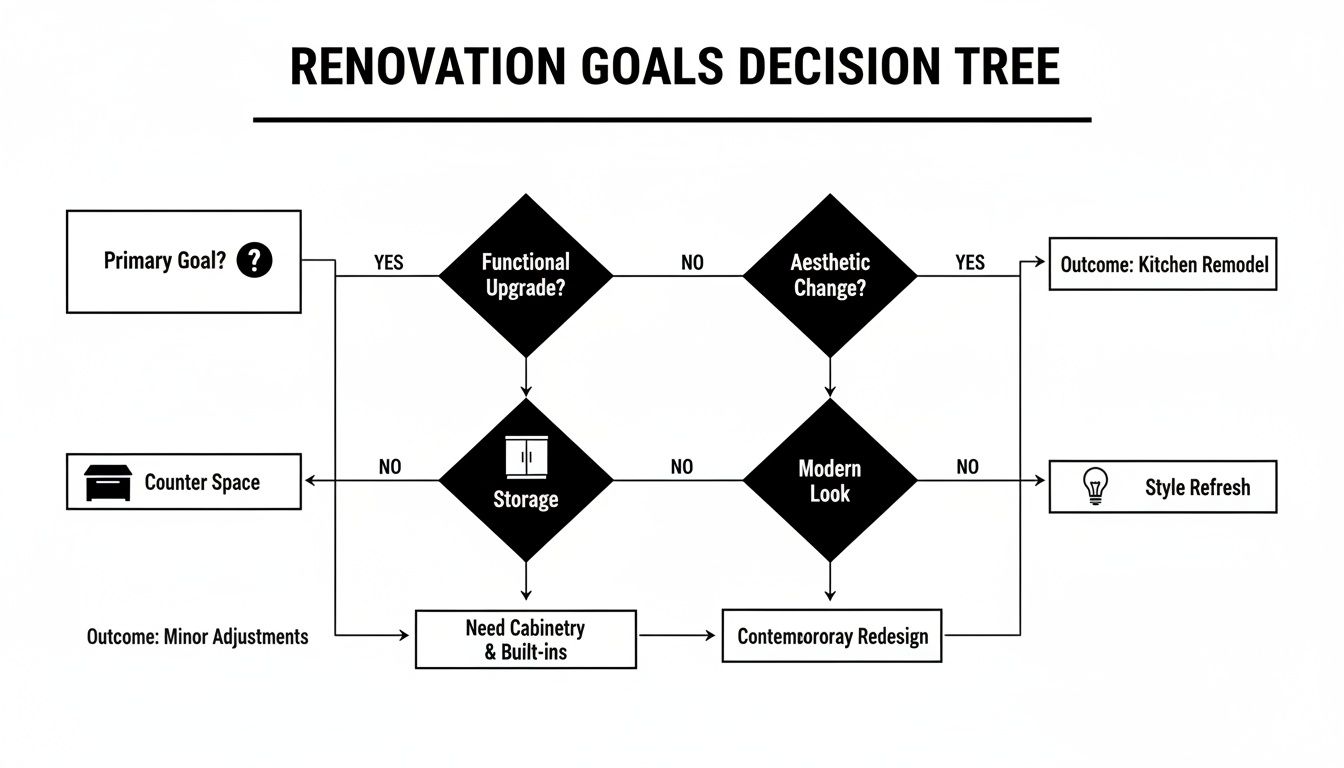
It’s a great way to figure out where to invest your budget and effort to solve your biggest pain points first.
Here are a few strategies I've seen work wonders:
- Go Vertical: Don't let that space above your head go to waste. Taking your upper cabinets all the way to the ceiling not only draws the eye upward, making the room feel taller, but it also gives you fantastic storage for those less-frequently used items.
- Integrate Appliances: Opt for panel-ready dishwashers and refrigerators that can be faced with your cabinet material. This creates a clean, uninterrupted visual line, which is a powerful tool for making a space feel larger and way less cluttered.
- Choose Smart Sizing: Seriously consider smaller, "condo-sized" appliances. A 24-inch fridge or stove can free up a surprising amount of counter and cabinet space without a huge sacrifice in functionality, especially for a smaller household. This one change can be a total game-changer when you're renovating a small kitchen.
Step 3: Selecting Smart Cabinetry for Small Spaces
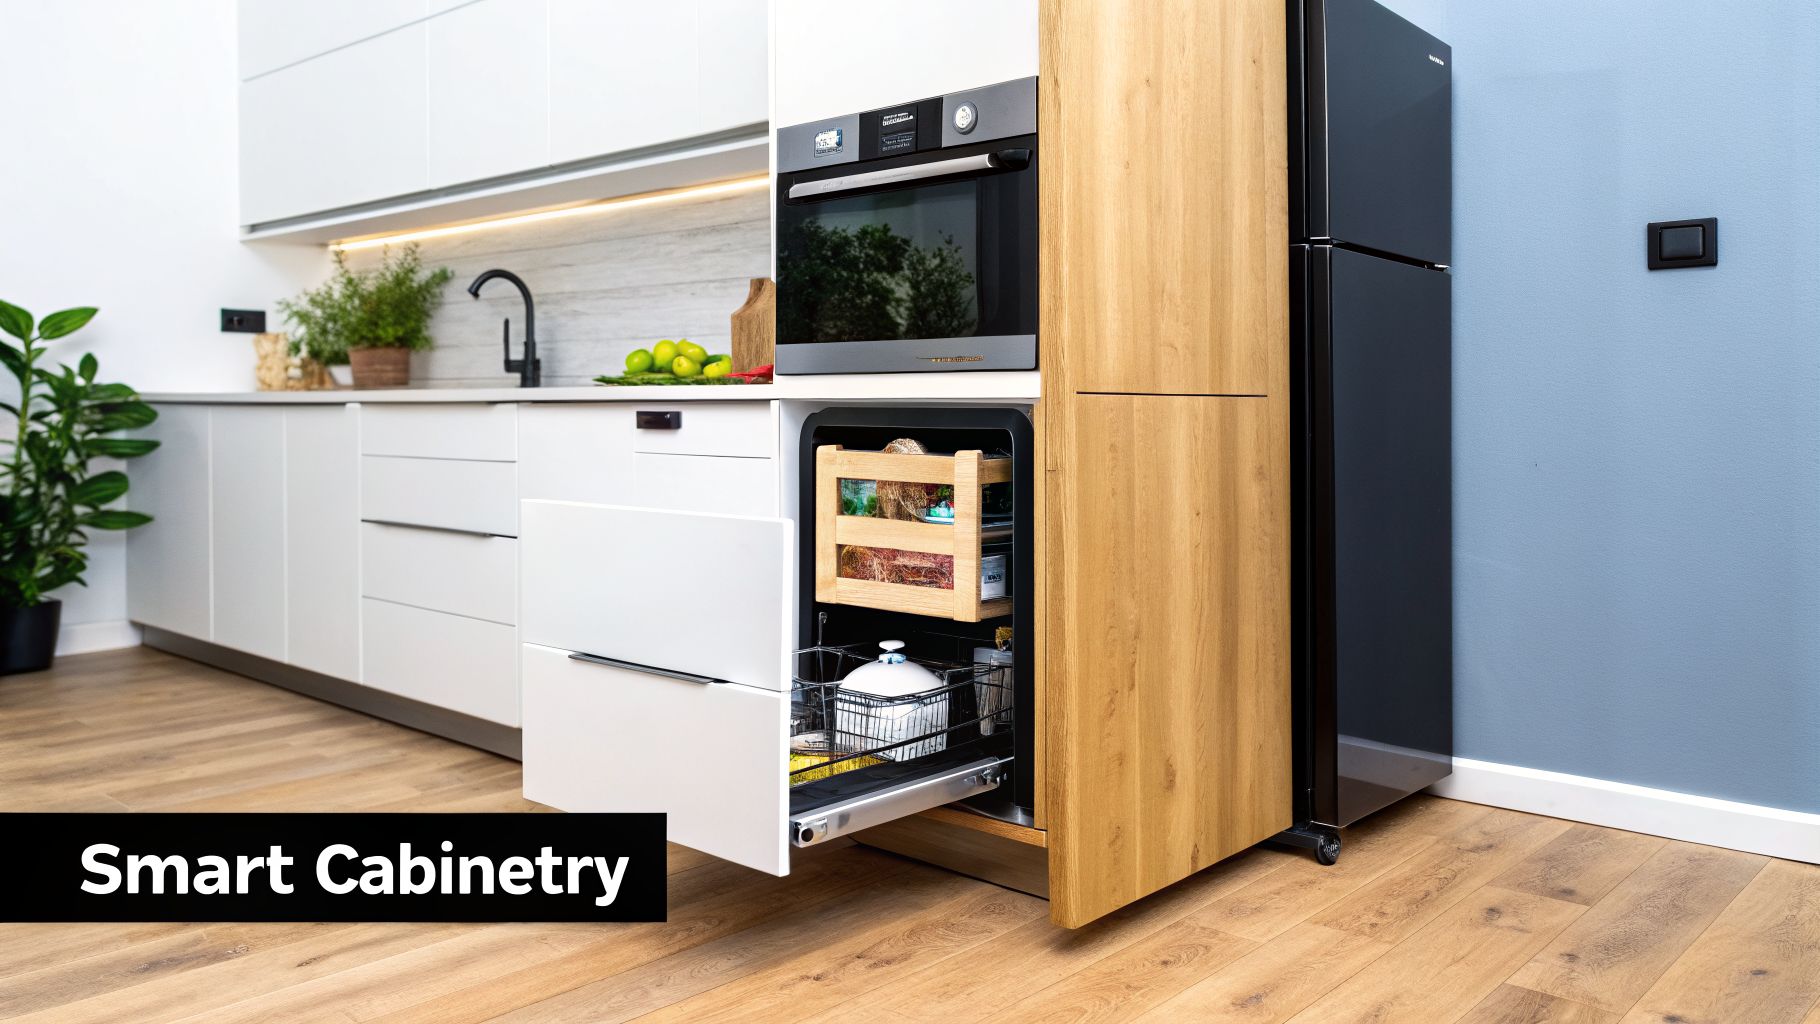
In any kitchen renovation, the cabinetry is the star of the show. It dictates the room’s style, sets the overall tone, and, most critically, handles the heavy lifting of storage. But when you’re working with a small kitchen in a Toronto or Markham home, the stakes are even higher. The right cabinets can be your secret weapon, making the space feel larger, brighter, and incredibly functional.
This isn’t just about picking a door style you like. It's about finding that perfect balance between aesthetics, durability, and space-saving smarts. Your choices here will pay off every single day, turning a cramped kitchen into a masterclass in efficiency.
Materials That Make a Big Difference
The material and finish you choose for your cabinets have a massive impact on the feel of your small kitchen. Lighter, reflective surfaces can visually open up a room, while the right textures add depth without feeling heavy.
HDF with Painted Finishes: High-Density Fibreboard (HDF) is an excellent choice for modern Toronto homes. When painted, it gives you a perfectly smooth, consistent surface for a clean, seamless look—exactly what you want in a minimalist design. A simple white or light grey painted HDF cabinet can make any small kitchen feel instantly brighter and more open.
High-Gloss HDF: If you’re after a contemporary vibe that bounces light around, high-gloss finishes are your best friend. The mirror-like surface reflects every bit of natural and artificial light, creating an illusion of depth. This is an old designer trick that works wonders in making a narrow galley kitchen feel wider.
Real Wood Doors: You just can’t beat the classic warmth of real wood. For smaller kitchens, I recommend sticking to lighter woods like maple or choosing doors painted in soft, airy tones. The subtle grain of a real wood door adds a touch of texture and quality that feels incredibly inviting without shrinking the space.
Durable Laminates: Forget the laminates of the past. Today’s options are incredibly resilient and stand up to moisture, scratches, and stains, which is great for busy households. They come in a huge range of colours and textures, offering a budget-friendly path to a sleek, modern look.
Finishes That Flatter a Small Footprint
The finish is the final touch that pulls it all together. Each one brings its own personality and practical benefits to the table, so it's worth thinking about how you use your kitchen.
| Finish Type | Best For | Key Benefit |
|---|---|---|
| Matte HDF | High-traffic areas | Hides fingerprints and diffuses light for a soft, sophisticated vibe. |
| High-Gloss | Light-starved kitchens | The ultimate light-reflector. It makes the space feel bigger and brighter. |
| Satin Paint | Classic or transitional styles | Offers a subtle sheen that’s easy to clean and forgiving of minor scuffs. |
| Thermofoil | Budget-conscious projects | Provides a seamless, durable surface that’s incredibly simple to maintain. |
Storage Solutions That Go Beyond the Box
In a small kitchen, what's inside the cabinets is just as crucial as what's on the outside. This is where you can get really creative and reclaim every last inch of wasted space. Trust me, standard shelves just won't cut it when you’re trying to maximize efficiency.
When every square inch is precious, you can't afford to have inaccessible corners or deep cabinets where things go to die. Smart interior fittings are not a luxury—they're a necessity for a truly functional small kitchen.
Think beyond basic shelves and consider these game-changers:
Pull-Out Pantries: A tall, narrow pull-out pantry can hold a shocking amount of groceries. Because it slides out completely, you can see everything at a glance. No more digging around in a dark cupboard for that can of tomatoes.
Magic Corner Units: We all know those awkward corner cabinets—they’re notorious space-wasters. A "Magic Corner" or a lazy Susan with pull-out shelves uses a simple mechanism to bring everything right out to you.
Appliance Garages: Keep your countertops clear! A designated cabinet with a lift-up or retractable door can hide your toaster, blender, and coffee maker, instantly cutting down on visual clutter.
Deep Drawers for Pots and Pans: Instead of a lower cabinet where you have to crouch down, opt for deep, heavy-duty drawers. It’s so much easier to access heavy pots and pans when you can just pull them out.
Smart cabinetry is what makes or breaks a small kitchen renovation. If you want a flawless result, professional cabinet replacement and installation services can help optimize your layout and ensure a perfect fit. And if you’re hunting for more inspiration, MapleKing has a fantastic collection of small kitchen cabinet ideas to get your creativity flowing.
Choosing Finishes That Enhance Small Kitchens
Alright, you’ve nailed down the layout and picked your cabinets. Now for the fun part—the details that truly bring a kitchen to life. The right finishes are like the perfect accessories for an outfit; they tie everything together and inject your personal style into the space. I'm talking about countertops, backsplashes, hardware, and especially, lighting.
These aren't just afterthoughts. In a small kitchen, every single choice has a massive impact on how large, bright, and welcoming the room feels. A light-coloured countertop can literally bounce light around the room, while a simple, elegant backsplash adds character without making the space feel busy. It’s all about making smart, deliberate choices.
Layering Light for Maximum Impact
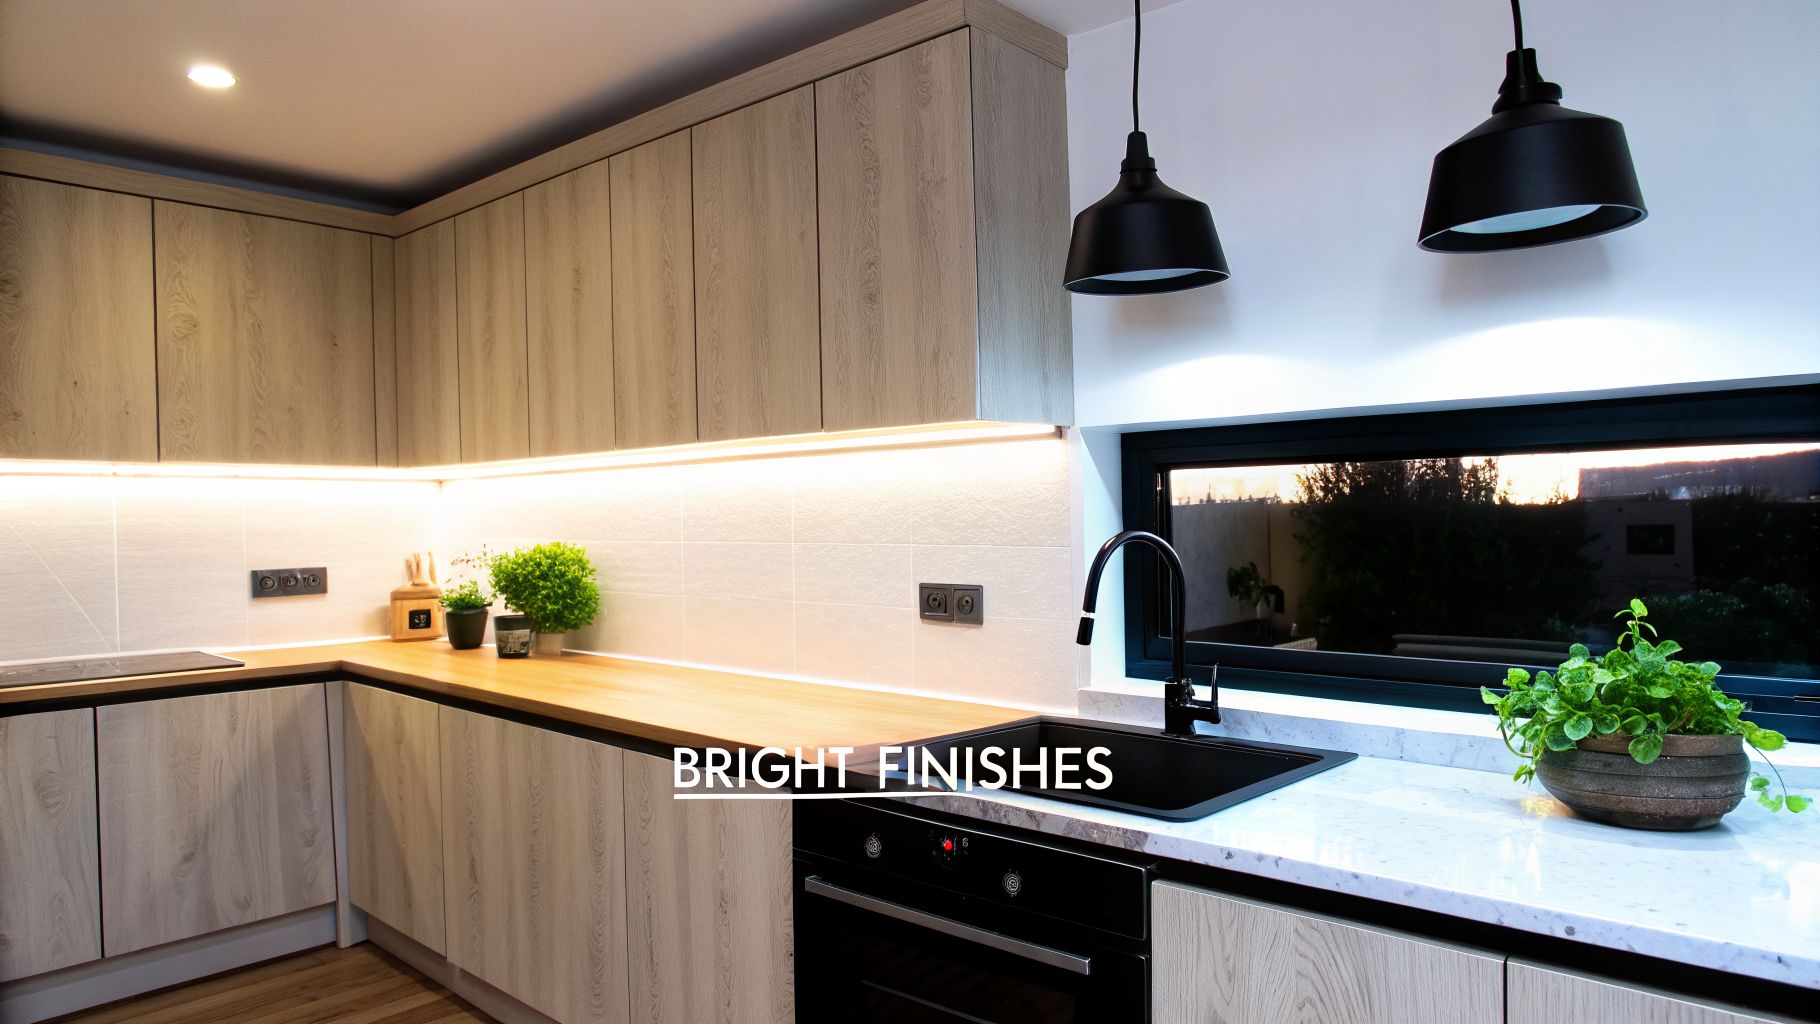
If there's one thing that will completely transform a small kitchen, it's the lighting. Seriously. A single, sad overhead fixture is a recipe for a cramped, shadow-filled cave. The secret is to think in layers to create an environment that's bright, inviting, and practical.
- Ambient Lighting: This is your foundation. Think recessed pot lights or a sleek flush-mount fixture that casts an even, overall glow across the entire room.
- Task Lighting: This is absolutely non-negotiable for anyone who actually cooks. Slim, under-cabinet LED strips are a game-changer. They light up your countertops right where you're chopping and prepping, eliminating those frustrating shadows.
- Accent Lighting: Have a little fun here. A beautiful pendant light over the sink or a small peninsula can add a dose of personality and a warm, focused glow. Just make sure the fixture is proportional to the space—anything too big will just feel clunky.
Selecting Countertops and Backsplashes
The surfaces you choose are huge players in the perception of space. For a smaller kitchen, the goal is almost always to create a clean, continuous look that tricks the eye into seeing a more expansive room.
Lighter colours are your best friend. A white or light grey quartz countertop, for example, is a fantastic choice. Not only is quartz incredibly durable and practically zero-maintenance, but its consistent, subtle patterning avoids the "busyness" that can make a small room feel cluttered. It reflects light beautifully, which is exactly what you want.
When it comes to the backsplash, less is more. You're looking to add a bit of texture and interest without creating visual chaos.
- Classic Subway Tile: You simply can't go wrong. A simple running bond pattern in a white or off-white tile keeps things clean and timeless. Pro tip: use a matching grout colour to enhance that seamless effect.
- Sleek Glass Panels: For the ultimate minimalist look, a single back-painted glass panel is tough to beat. There are no grout lines to clean, and its reflective surface does a wonderful job of bouncing light around.
- Vertical Stacked Tile: Want a more modern vibe? Try stacking simple rectangular tiles vertically instead of in the traditional brick pattern. This little trick draws the eye upward, creating an illusion of height—a powerful tool in a compact kitchen.
The most successful small kitchen designs I've seen almost always feature a low-contrast palette between the countertop and backsplash. This visual continuity helps to expand the space, making the countertop feel deeper and the room less visually chopped up.
The Final Touch with Hardware and Faucets
Often called the "jewellery" of the kitchen, cabinet hardware and faucets are where you can really let your style shine through. They might seem like small details, but trust me, they make a significant difference in how polished and complete your renovation feels.
When choosing pulls and knobs, think about both looks and feel. Simple, streamlined bar pulls can visually elongate your cabinets, while minimalist knobs offer a clean, uncluttered aesthetic. The finish—whether it’s matte black, brushed brass, or polished chrome—should complement the other metallic elements in the room, like your appliances and faucet.
Don't be afraid to mix metals, but do it with intention. A good rule of thumb is to match the faucet to the sink, then choose a different, complementary metal for your cabinet hardware and lighting. This creates a curated, layered look that feels thoughtful and custom. A high-arc, pull-down faucet is also a practical upgrade you won't regret, making life much easier in a compact sink area.
Bringing Your Kitchen Renovation to Life
You’ve got the vision, you’ve made your plans, and now it’s time to make it all happen. This is where the real work begins. Managing a small kitchen renovation, especially in a bustling area like Toronto or Markham, is all about coordinating the right people, handling the paperwork, and keeping everything on track. With a solid game plan, you can navigate this phase like a pro and avoid the common headaches.
A brilliant design is one thing, but it’s the team on the ground that truly brings it to life. Finding the right contractor is probably the single most important decision you'll make in this entire process. You’re not just hiring someone to hang cabinets; you’re looking for a partner who communicates clearly, respects your home, and has a portfolio of quality work to back it all up.
Finding and Vetting Your Contractor
The best way to start your search is by word-of-mouth. Ask friends, neighbours, or local designers who they’ve had a great experience with. Online platforms can be a good jumping-off point, but always do your own homework. Once you have a shortlist of three or four candidates, it’s time to start asking the tough questions.
Here’s what you need to ask every single contractor you interview:
- Are you licensed and fully insured? Don't be shy about asking for proof of their WSIB coverage and liability insurance. This is a non-negotiable step that protects you from any accidents that might happen on your property.
- Can I speak to some of your recent clients? A good contractor will be happy to provide references. Talk to their last three clients and ask about communication, how they handled the budget, and the quality of the finished product.
- Who will be my daily point of contact? Will you be dealing directly with the contractor you're hiring, or will a project manager be on-site? Knowing who to call with a question is crucial for smooth communication.
- What’s your process for changes or unexpected problems? Renovations rarely go 100% according to plan. A professional will have a clear system for change orders, so you understand exactly how any adjustments will affect your timeline and budget.
A word of caution: if one quote comes in dramatically lower than the others, be skeptical. While it might seem like a great deal, a lowball offer can be a red flag for cutting corners, using cheap materials, or simply misunderstanding the scope of the job.
You won’t need a permit for simple cosmetic updates, but for bigger changes, you absolutely will. In municipalities like Toronto and Markham, a building permit is typically required if your project involves:
- Moving or taking down walls (any structural work)
- Altering your plumbing or drainage layout
- Making significant changes to the electrical wiring
Getting a permit means submitting your detailed design plans for review by the city. Your contractor should be an expert in this and can either guide you through the process or handle the application entirely. Don't be tempted to skip this step—working without a required permit can result in hefty fines and work-stoppage orders.
Creating a Realistic Project Timeline
Knowing the sequence of events can save you a lot of stress. While every project is a bit different, a small kitchen renovation generally follows a predictable flow.
- Demolition and Prep (3-5 days): This is the messy part. Old cabinets, countertops, flooring, and appliances come out. It’s also when the initial rough-ins for new plumbing and electrical are done.
- Installation Phase (1-2 weeks): This is when you see real progress. New cabinets go in, the flooring is laid, and the countertops are measured and installed.
- Finishing Touches (1 week): The final stretch! This includes installing the backsplash, painting, hooking up appliances and plumbing fixtures, and adding the final lighting and cabinet hardware.
A safe bet is to plan for your kitchen to be completely out of commission for at least three to four weeks.
Smart Ways to Save Money
Even with a well-planned budget, who doesn’t want to save a few dollars? Kitchen renovations are a significant investment, so spending smartly is key. The good news is that these updates often pay for themselves when it comes time to sell. To see how other homeowners are getting the most bang for their buck, check out the recent Houzz research on kitchen trends.
One pro tip is to schedule your renovation during the off-season, which is usually late fall through winter. Contractors are often a bit slower then, and you might find more competitive pricing. And if you're handy, taking on tasks like painting or demolition yourself can definitely help trim those labour costs.
Got Questions About Your Small Kitchen Reno? We've Got Answers
Taking the plunge on a kitchen renovation is a big step, and it's totally normal to have a long list of questions. From "how long will this take?" to "how will I make coffee?", figuring out the details beforehand makes the whole process feel much more manageable. We've been through this with countless Toronto and Markham homeowners, so we’ve rounded up the questions we hear most often.
Getting clear on these points early on is the best way to avoid surprises and keep your project on track. Let's tackle some of the biggest concerns that pop up when you're redoing a small kitchen.
How Long Until I Can Use My Kitchen Again?
This is the big one, isn't it? While no two projects are identical, a typical small kitchen renovation—from the first swing of the sledgehammer to the final cabinet pull—usually takes about three to five weeks. This timeframe hinges on one crucial factor: having all your materials, especially cabinets and countertops, on-site before the work starts.
Remember, this is the stretch when your kitchen will be out of commission. The work typically breaks down like this:
- Demolition & Rough-ins (3-5 days): The crew rips out the old kitchen and gets the new plumbing and electrical lines in place. It's dusty, loud, and exciting.
- Installation (1-2 weeks): This is where you see the most dramatic change. New flooring goes down, followed by the cabinet installation and countertop templating and fitting.
- The Finishing Touches (about 1 week): This final phase covers everything from installing the backsplash and light fixtures to painting, hooking up the sink and dishwasher, and putting on all the new hardware.
Is Renovating My Small Kitchen Actually Worth It for Resale?
You bet it is. A kitchen renovation consistently ranks as one of the smartest home improvements you can make, delivering a fantastic return on investment. In a hot market like the GTA, even a well-planned cosmetic update can help you recoup a huge chunk of your spending when you sell.
Today’s buyers are looking for move-in-ready homes, and a modern, functional kitchen is a massive selling point. A smart design that makes a small space feel bright, open, and full of clever storage can make your home the one they remember.
Should I Go with Custom or Stock Cabinets?
This decision really comes down to your budget and the unique quirks of your space.
- Stock Cabinets: These are your off-the-shelf, standard-sized cabinets. They're the most affordable choice and can work perfectly well in a simple, straightforward kitchen layout. The trade-off is limited flexibility for odd angles or non-standard dimensions.
- Custom Cabinets: Built from scratch to fit your kitchen's exact measurements, custom cabinets are the ultimate space-saving solution. You can dictate the depth, width, and height, unlocking storage potential in every nook and cranny. While the upfront cost is higher, the improvement in day-to-day function is often priceless.
For many older Toronto homes with their less-than-square walls and unique layouts, a semi-custom or fully custom approach is often the only way to go. The ability to specify a slightly narrower cabinet to fit around a pipe, for example, is a game-changer that stock options just can't offer.
How Do I Survive Without a Kitchen?
Living through a reno is a test of patience, but a bit of prep makes all the difference. The trick is to set up a "temporary kitchen" somewhere else in the house, like the dining room or even a corner of the basement.
Before the chaos begins, carve out a makeshift space with these essentials:
- Your microwave, coffee maker, and maybe a kettle or toaster oven.
- A mini-fridge or a good cooler to hold the basics.
- A temporary wash station—a big basin or your laundry room sink will do the trick.
- A small folding table to act as your countertop.
- A healthy supply of paper plates and disposable cutlery to save your sanity.
Plan for simple meals, fire up the BBQ, and budget for a little extra takeout. It’s a short-term headache, but keeping your eyes on the prize—that beautiful new kitchen—makes it all worthwhile.
Ready to transform your small kitchen with cabinetry that's as smart as it is stylish? At MapleKing Kitchen Cabinets, we specialize in creating custom solutions that make the most of every square inch. Explore our gallery and get a free quote today!



