

The dream of a spacious, functional kitchen with a central island often feels out of reach for homeowners in Toronto and Markham, where compact condos and townhouses are the norm. However, a small footprint doesn't have to mean sacrificing style or utility. The key lies in strategic design and clever space optimisation. This guide explores eight innovative kitchen designs for small kitchens with islands, proving that you can achieve a beautiful, multifunctional hub for cooking, dining, and entertaining, no matter the size of your space.
We will delve into specific layouts, material choices, and space-saving strategies that deliver maximum impact. Forget the outdated notion that islands are only for sprawling kitchens; we will demonstrate how compact, mobile, and even hybrid peninsula-island designs can transform cramped quarters into efficient culinary workspaces. Each concept is presented with actionable insights, focusing on real-world applications for typical Greater Toronto Area homes. When reimagining your compact kitchen with an island, a crucial first step is understanding scale; consult a practical guide to kitchen island size guidelines to ensure your design is both functional and proportionate.
From smart cabinetry solutions that boost storage to visual tricks that create an illusion of spaciousness, you'll find practical solutions tailored to your needs. We will also touch on how factory-direct cabinetry providers can make custom, space-efficient solutions both accessible and affordable, allowing you to achieve a high-end look without the premium price tag. Let's explore how to make a kitchen island the hardworking centrepiece of your small kitchen.
1. Compact Galley Island with Seating
For homeowners grappling with narrow layouts, particularly in Toronto's condos and townhouses, the compact galley island is one of the most effective kitchen designs for small kitchens with islands. This design embraces a long, slender footprint that runs parallel to the main counter run, transforming a restrictive galley or single-wall kitchen into a highly functional and social space. Its primary advantage is maximizing workspace and adding seating without consuming the precious width of the room.
This approach creates a clear, efficient work triangle while simultaneously establishing a casual dining zone. The island acts as a central hub for meal prep, and with an overhang on one side, it comfortably accommodates two to three counter-height stools. This dual-purpose functionality is critical in small homes where a separate dining room is a luxury. We often see this layout executed beautifully in Liberty Village condos, where it separates the kitchen from the living area in an open-concept floor plan without a solid wall.
Implementation and Material Tips
To ensure this design feels integrated rather than intrusive, consider these practical tips:
Choose Reflective, Durable Finishes: Pairing a narrow island with a light-coloured, high-gloss finish can make a small space feel significantly larger. MapleKing’s high-gloss HDF (High-Density Fibreboard) cabinets are an excellent choice, as their reflective surface bounces light around the room, creating an airy, modern aesthetic. For high-traffic seating areas, a matte HDF finish offers superior fingerprint resistance and durability.
Prioritize Seating Comfort: Ensure the island includes a sufficient countertop overhang (a minimum of 10-12 inches) for comfortable knee space. Integrating a recessed toe-kick along the seating side allows guests to sit closer to the counter without obstruction, a small detail that greatly enhances comfort.
Incorporate Smart Storage: To avoid a monolithic look, consider integrating open shelving on the island's end cap. This breaks up the solid mass of cabinetry, provides a spot for decor or cookbooks, and contributes to a feeling of spaciousness.
Add Strategic Lighting: A pair of stylish pendant lights suspended above the island not only provides essential task lighting for food preparation but also defines the dining zone and adds a touch of design flair. This layered lighting approach is crucial for both function and ambiance.
2. Mobile/Rolling Island with Lockable Casters
For homeowners who prioritize flexibility, a mobile or rolling island stands out as one of the most innovative kitchen designs for small kitchens with islands. This solution features a freestanding island unit fitted with high-quality, lockable casters, allowing it to be moved or repositioned on demand. Its greatest advantage is its adaptability; it can be pushed aside to create an open floor plan for entertaining, moved to the centre for meal prep, or even rolled out of the way for easy cleaning.
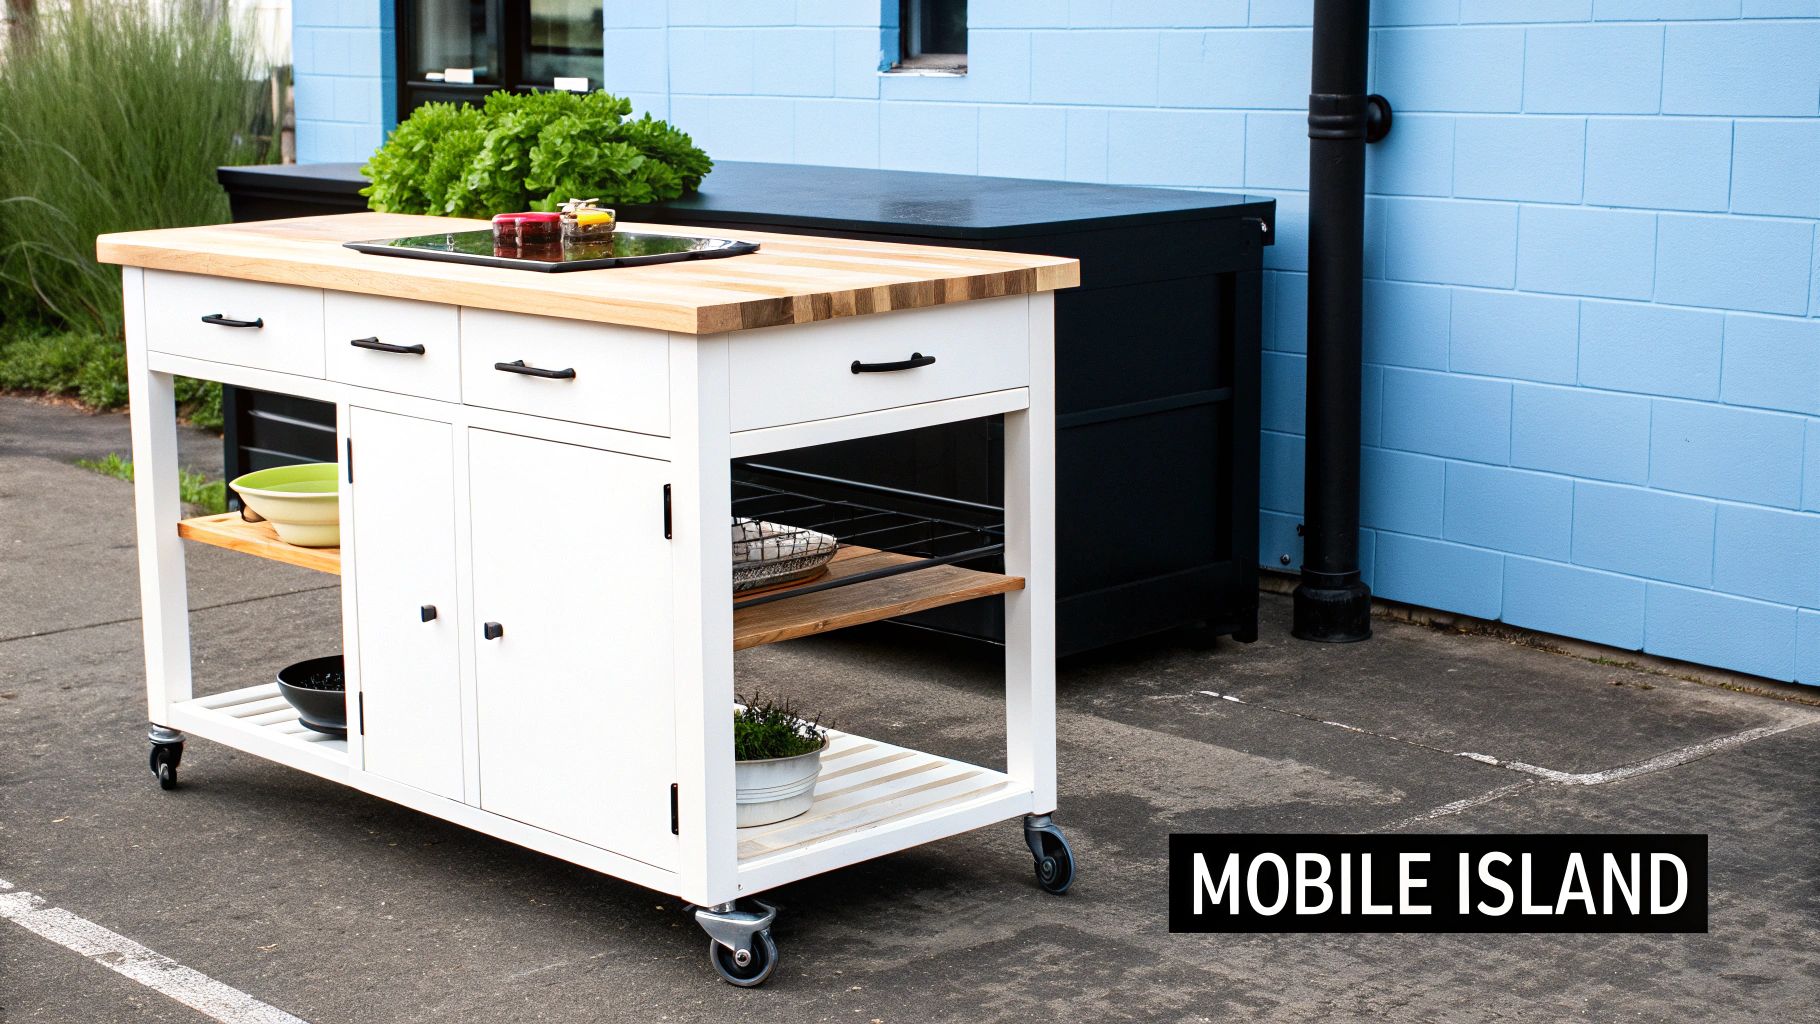
This design is particularly effective in compact urban spaces, like Toronto condos or Markham rental properties, where a fixed island might feel too restrictive. A mobile island provides the benefits of extra counter space and storage without the permanent commitment, making it a favourite for real estate flippers who need to present an adaptable layout. It can serve as a prep station one moment and a serving cart the next, offering a level of versatility that fixed islands cannot match.
Implementation and Material Tips
To ensure your mobile island is both functional and stylish, consider these practical tips:
Select a Resilient Finish: Since a mobile island will be handled frequently, choosing a durable, low-maintenance finish is key. MapleKing’s matte HDF cabinets are an ideal choice, as their non-reflective surface is excellent at hiding fingerprints and resisting minor scuffs that occur during movement.
Prioritize High-Quality Hardware: The mobility of the island depends entirely on its wheels. Invest in commercial-grade locking casters that are rated to support the full weight of the island and its contents. Strong locks are non-negotiable to ensure the unit stays securely in place during use.
Design for Maneuverability: Keep the island's dimensions modest, ideally under 36 inches in width, to ensure it can be moved easily through doorways and around existing furniture. Incorporating rounded corners is a smart safety feature that can prevent painful bumps in a tight kitchen layout.
Think About Power Integration: For maximum utility, consider integrating a power source. A recessed outlet with a coiled cord management system in the base can transform your mobile island into a functional workstation for small appliances, future-proofing its design.
3. L-Shaped Kitchen Layout with Corner Island
For homeowners with L-shaped kitchens, especially common in Markham’s suburban homes and open-concept Toronto layouts, finding space for an island can seem impossible. The L-shaped layout with a corner island offers a clever solution, transforming an often underutilized corner into the kitchen's focal point. This approach introduces one of the most strategic kitchen designs for small kitchens with islands by placing a compact, often custom-shaped, island diagonally across the L's inner corner, preserving crucial traffic flow around the perimeter.
This design masterfully converts dead space into a functional work zone, prep area, or even a small breakfast nook. Unlike a traditional rectangular island that might block access to cabinets or appliances, the corner island maintains open pathways to both legs of the kitchen. We see this configuration frequently in luxury downtown Toronto condos where the kitchen flows directly into the living area, and the island serves as a subtle yet effective spatial divider without closing off the room.
Implementation and Material Tips
To execute this unique design successfully, precision and smart material choices are key:
Ensure a Perfect Fit: A corner island must be precisely measured to avoid creating awkward pinch points. Using a custom measurement service ensures the island fits the unique geometry of your corner, maintaining the recommended 18-24 inches of clearance for comfortable movement. This is where professional kitchen design and cabinetry expertise becomes invaluable.
Highlight with Natural Finishes: A corner island is a statement piece. Using real wood painted doors can accentuate its unique shape and bring warmth to the kitchen. The natural grain, visible even through a coat of paint, adds texture and a premium feel, turning a functional element into a beautiful centrepiece.
Optimize Corner Storage: Complement the island by making the adjacent corner cabinets highly accessible. Installing a lazy Susan or other pull-out corner storage solution ensures that no space is wasted and every item remains within easy reach, maximizing the efficiency of the L-shaped layout.
Add Under-Island Lighting: Corners can often be dark. Installing LED strip lighting under the island's countertop overhang not only improves visibility for tasks but also creates a sophisticated, floating effect. This ambient lighting enhances the kitchen's atmosphere and draws attention to the island's unique design.
4. Two-Tier Island with Differing Heights
For those seeking to maximize function without sacrificing style, the two-tier island is one of the most sophisticated kitchen designs for small kitchens with islands. This design features two distinct counter heights on a single island base: a lower surface for food preparation (standard 36-inch counter height) and a raised surface for dining or entertaining (bar height, typically 42 inches). Its key advantage is its ability to clearly delineate work and social zones within a compact footprint, creating visual depth and enhanced utility.
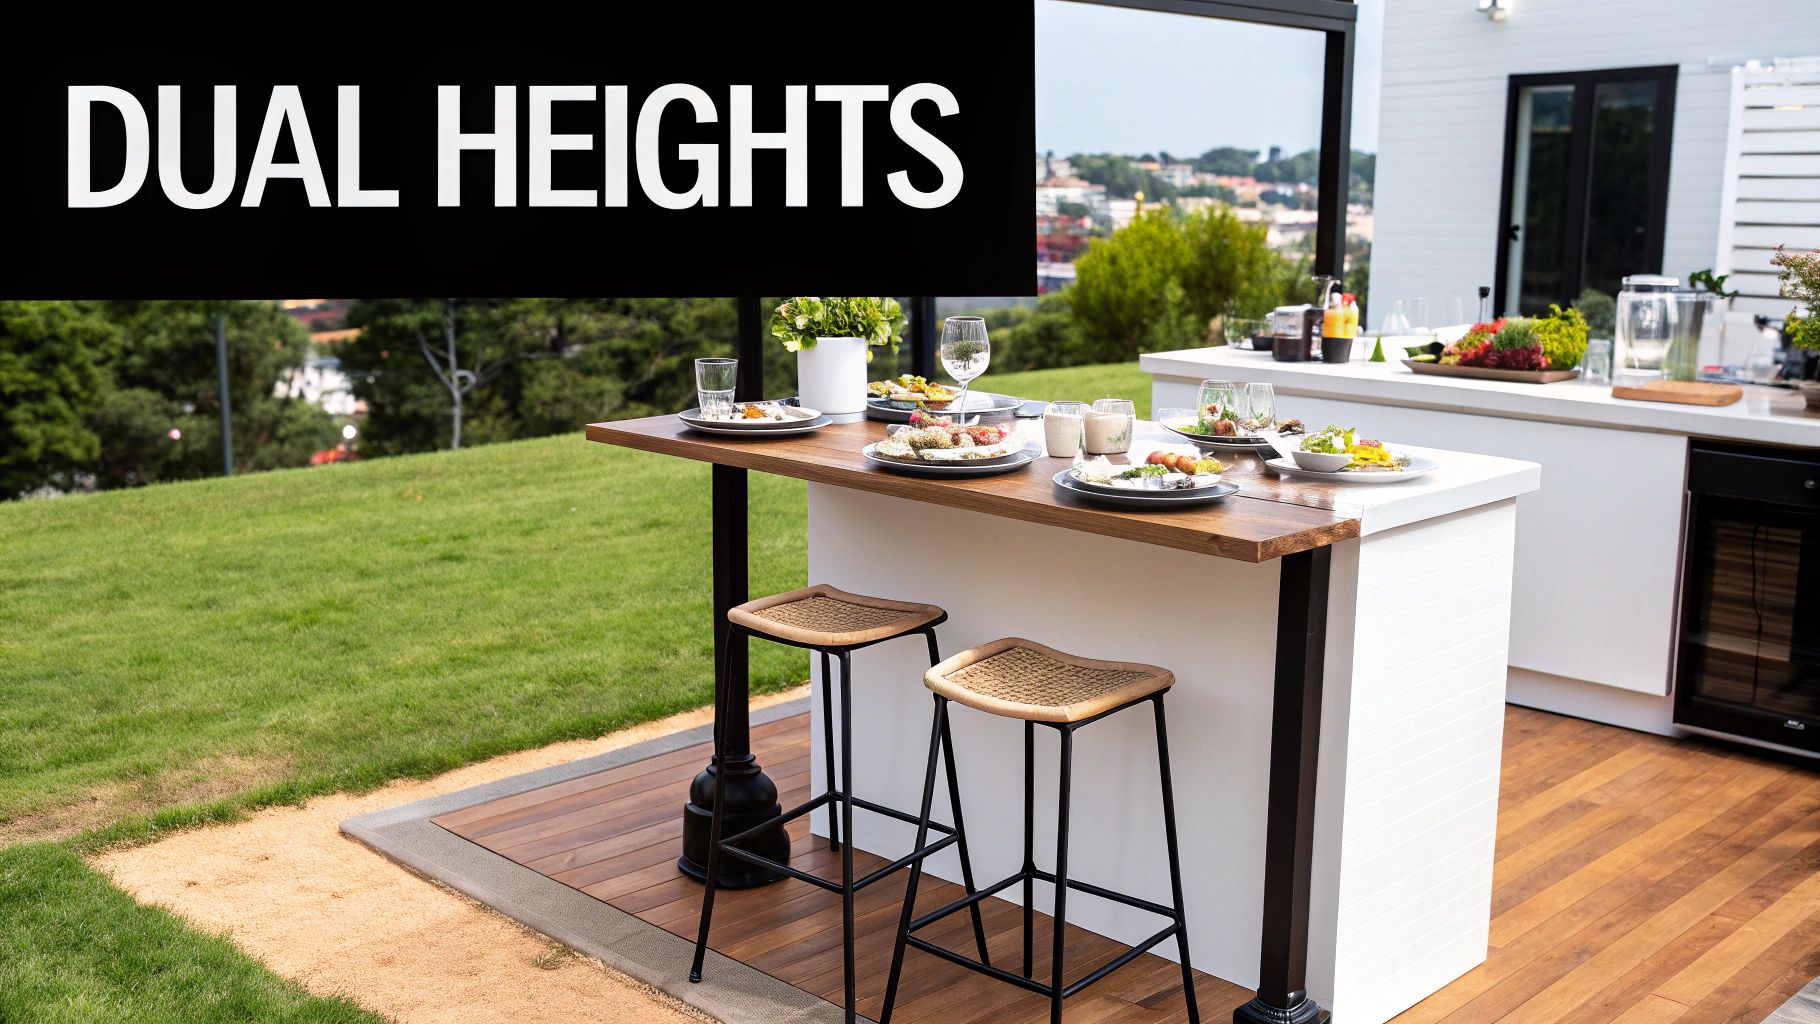
This split-level approach is increasingly popular in high-end Toronto loft conversions and new luxury builds in Markham, where a single, multi-purpose piece of furniture must serve several roles. The raised bar-height tier effectively hides prep-zone clutter from the view of guests seated at the island or in an adjacent living area. This creates a more organized and polished look in open-concept spaces while providing a comfortable, café-style dining experience.
Implementation and Material Tips
To successfully execute a two-tier island that feels both intentional and functional, consider these tips:
Use Contrasting Finishes: Emphasize the two distinct zones by using different materials or finishes. For example, pair a durable, easy-to-clean matte HDF surface for the lower prep area with a warmer, more decorative painted wood finish for the upper dining tier. This contrast adds a custom, high-end feel.
Plan for Ergonomics and Clearance: Ensure the upper tier has a generous overhang of at least 15 inches to provide comfortable legroom for bar-height stools. The height difference between the two tiers should also be sufficient (around 6 inches) to create a clear visual and functional separation.
Integrate Layered Lighting: Define each zone with dedicated lighting. Install bright, focused task lighting, like recessed pot lights, above the lower prep surface. Suspend stylish pendant lights over the raised dining area to create a more intimate, ambient glow for socializing.
Incorporate Smart Tech and Storage: Plan ahead with your contractor to run electrical and plumbing to the island. The void created under the raised tier is an ideal spot for installing electrical outlets for small appliances or integrating an under-counter beverage cooler or wine fridge.
5. Waterfall Edge Island with Open Shelving
For those seeking a contemporary and luxurious feel, the waterfall edge island is one of the most visually impactful kitchen designs for small kitchens with islands. This design features the countertop material flowing vertically down one or both sides of the island, creating a seamless and sculptural look. When paired with open shelving instead of solid cabinetry on one side, it masterfully balances a high-end aesthetic with a feeling of lightness and accessibility, preventing the island from appearing bulky.
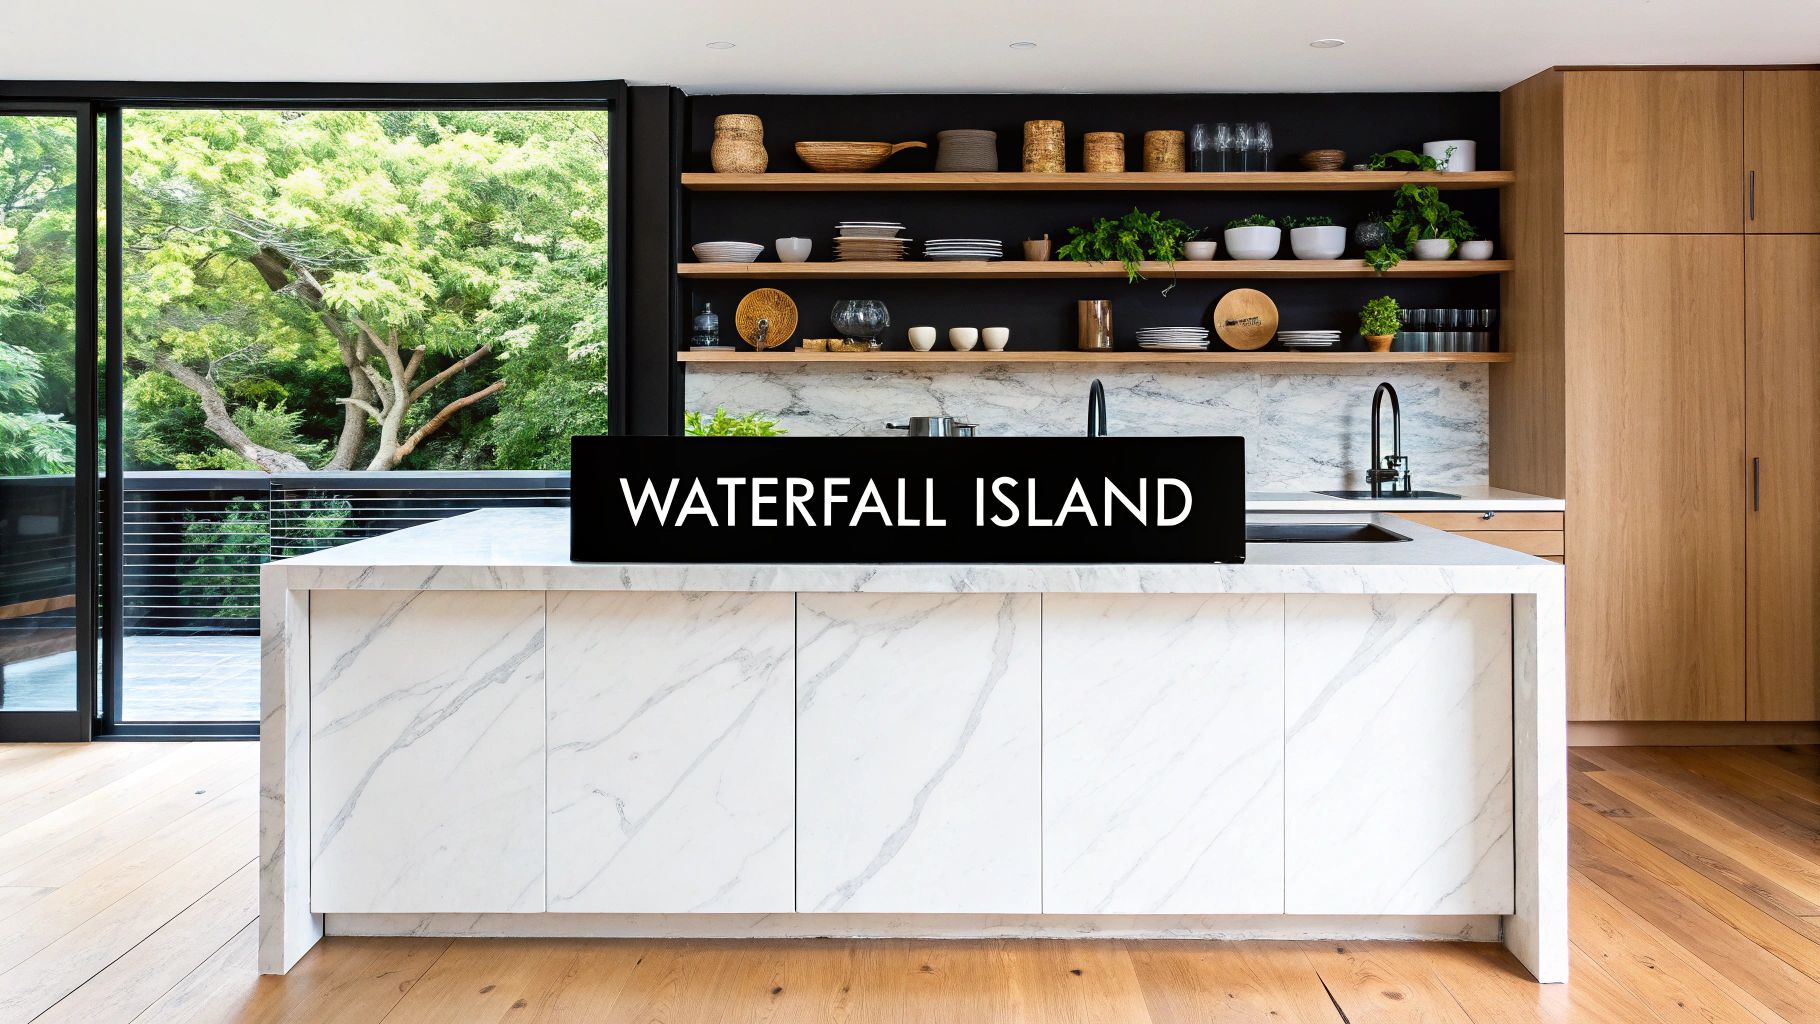
This sophisticated approach is particularly popular in modern Toronto and Markham condos where the kitchen is often the centrepiece of an open-concept living area. The waterfall edge acts as a finished piece of furniture, while the open shelving offers a curated space for cookbooks, decorative items, or frequently used dishware. It transforms the island from a purely utilitarian feature into a deliberate design statement that elevates the entire room.
Implementation and Material Tips
To successfully execute this sleek design in a compact space, consider these key points:
Select the Right Materials: Durable and non-porous materials like quartz or modern laminates are ideal for waterfall edges, as they resist chipping and staining. Pair this with sleek cabinetry, such as MapleKing’s high-gloss HDF painted doors, to create a cohesive, minimalist aesthetic that reflects light and enhances the sense of space.
Curate Your Shelving: The success of open shelving hinges on organization. Keep the display minimal and curated. Use matching containers, stack dishes neatly, and add a touch of personality with a small plant or a few select decorative objects to avoid a cluttered look.
Integrate Subtle Lighting: Install discrete LED strip lighting under the open shelves or the countertop overhang. This provides a soft, ambient glow that highlights the displayed items and adds a layer of warmth and sophistication to the kitchen, especially in the evening.
Maintain a Monochromatic Palette: To amplify the modern, streamlined effect, stick to a monochromatic or neutral colour scheme. This allows the clean lines of the waterfall edge and the texture of your displayed items to stand out, creating a calm and organised visual experience. Considering the right cabinets for a kitchen island is crucial to achieving this unified look.
6. Peninsula-to-Island Hybrid Design
For kitchens with challenging or unconventional footprints, the peninsula-to-island hybrid offers one of the most clever kitchen designs for small kitchens with islands. This approach merges a peninsula, which is attached to a wall or main cabinet run, with a freestanding island element to form a "T" or "L" shape. It’s an ideal solution for homeowners in Markham and Toronto who need more continuous counter space than a small island can offer but want to avoid fully enclosing their kitchen like a traditional peninsula would.
This hybrid design maintains a partial connection to the main kitchen layout, which can be invaluable for routing plumbing or electrical without extensive floor work. At the same time, the island portion creates open circulation paths and a designated social zone. We often see this specified by contractors in Markham townhouse kitchen renovations where a structural pillar or awkward corner prevents a standard island installation, allowing for an efficient, custom-fit solution.
Implementation and Material Tips
To successfully execute this versatile and space-saving design, consider these key strategies:
Ensure Visual Cohesion: The peninsula and island components must look like a single, intentional piece. Use matching cabinetry and countertops to create a seamless flow. For example, using MapleKing’s matte HDF in a consistent colour for all base cabinets will unify the structure and provide a durable, fingerprint-resistant surface perfect for a high-traffic zone.
Plan Seating Strategically: To maximize circulation, confine seating to the outer edge of the "island" portion of the hybrid. This prevents stools from obstructing primary walkways between the sink, stove, and refrigerator. An overhang of 12-15 inches on this side will ensure comfortable legroom.
Optimize Functionality: Designate clear zones for different tasks. Use the peninsula section, which is connected to the main cabinetry, for housing appliances like a microwave drawer or a beverage cooler. This keeps the island portion free for food preparation, serving, and socializing.
Consult for Customization: A hybrid design is not a one-size-fits-all solution; it must be tailored to your specific layout. Leveraging a professional consultation can help optimize the dimensions and shape to ensure it enhances, rather than hinders, your kitchen’s workflow and overall feel.
7. Narrow Prep-Only Island with Appliance Integration
For the passionate home chef working within a confined space, a narrow prep-only island with integrated appliances is one of the most sophisticated kitchen designs for small kitchens with islands. This design dedicates a slim footprint, often just 18 to 24 inches wide, exclusively to cooking and food preparation. It transforms a small kitchen into a high-performance culinary workspace by centralizing key cooking functions without demanding the floor space of a traditional, multi-purpose island.
This specialized approach is gaining popularity in high-end Toronto lofts and luxury Markham homes where homeowners prioritize professional-grade functionality. Instead of seating, the island’s surface and base are utilized for integrated appliances like a cooktop, built-in grill, or warming drawer. This creates an incredibly efficient "chef's station" where all primary cooking activities can happen in one spot, improving workflow and keeping the main counters clear for other tasks.
Implementation and Material Tips
To successfully execute this advanced design, meticulous planning and material selection are key:
Plan with Professionals: Integrating appliances, particularly cooktops with high BTUs, requires expert planning. Work with MapleKing’s design team and licensed electricians to ensure proper wiring, ventilation ducting, and compliance with local building codes. This collaboration is crucial for both safety and functionality.
Choose Heat-Resistant, Durable Materials: The island surface will be exposed to high heat and moisture. A high-quality, heat-resistant material like HDF thermofoil or commercial-grade laminate is essential. For cabinetry, consider a matte HDF finish, which is excellent at concealing minor scratches and potential heat-related discolouration over time.
Ensure Proper Clearances and Ventilation: A functional cooking island needs adequate landing space. Plan for at least 12 inches of clear counter on each side of the cooktop for placing hot pots and pans. Proper ventilation is non-negotiable; ensure the exhaust hood is sized correctly for your cooktop's output.
Integrate Supporting Electricals: While the island houses the main appliance, you’ll need supporting power. Install an electrical outlet on a nearby wall or the island's end panel to easily use mixers, blenders, and other small appliances during food preparation.
8. Curved or Soft-Edge Island for Safety and Flow
In high-traffic small kitchens, particularly those in family homes, sharp corners on an island can be a hazard. A curved or soft-edge island is one of the more thoughtful kitchen designs for small kitchens with islands because it prioritizes both safety and aesthetics. By replacing harsh 90-degree angles with gentle curves, this design improves circulation, prevents painful bumps, and creates a softer, more inviting visual flow. It’s an increasingly popular choice for family-oriented renovations in Markham and Toronto, where making every square foot safe and functional is paramount.
This approach is about more than just child-proofing; it guides movement naturally around the island, making the kitchen feel less constricted. A curved end can gracefully direct traffic away from the main work zone or create a more inclusive seating nook that encourages conversation. This design choice transforms the island from a purely functional block into a sculptural centrepiece that enhances the overall harmony of the space.
Implementation and Material Tips
To successfully integrate a curved island into your small kitchen, consider the following details:
Custom Cabinetry is Key: Achieving a seamless, elegant curve requires precision. MapleKing’s custom capabilities allow for the creation of curved HDF cabinet doors and panels that follow the island's contour perfectly, avoiding the segmented look of standard angled cabinets. A high-gloss or matte HDF finish will accentuate the smooth lines beautifully.
Choose Complementary Countertops: Select a countertop material that can be fabricated with a rounded or bullnose edge to match the island's shape. Quartz and some high-quality laminates are excellent choices as they can be cut and finished without sharp transitions, ensuring a cohesive and safe surface.
Plan Seating Strategically: A curved overhang can create a cozy and social dining spot. Ensure there is still adequate knee room (at least 10-12 inches) and plan the placement of counter stools so they don’t obstruct key walkways. A pedestal base can sometimes work better than traditional corner legs for curved designs.
Leverage Lighting to Highlight Form: Use lighting to emphasize the island's unique shape. A series of small pendants following the curve or under-counter LED strips can cast a soft glow that highlights its gentle lines and adds a layer of ambient light, making the kitchen feel more welcoming. You can explore how different materials interact with light by reviewing various wood island kitchen inspirations.
8-Point Comparison: Small Kitchen Island Designs
| Design | 🔄 Implementation Complexity | ⚡ Resource & Efficiency | ⭐ Expected Outcomes | 📊 Ideal Use Cases | 💡 Key Advantages / Tips |
|---|---|---|---|---|---|
| Compact Galley Island with Seating | Low–Medium — straightforward cabinetry, standard finishes | Efficient footprint, cost-effective materials | ⭐ Practical: adds prep surface + 2–3 seats | Small condos, narrow galley kitchens | 💡 Use light HDF finishes, pendant lighting, keep 12–15" overhang |
| Mobile/Rolling Island with Lockable Casters | Low — simple build but requires quality hardware | Highly flexible, needs heavy-duty casters & occasional maintenance | ⭐ Flexible: reconfigures layout for cleaning/entertaining | Rentals, frequent movers, compact urban units | 💡 Install commercial lockable casters, rounded corners, matte HDF to hide marks |
| L-Shaped Kitchen Layout with Corner Island | Medium — custom measurements and corner cabinetry | Efficient use of corner space; moderate material needs | ⭐ Efficient workflow; retains clear traffic flow | Open-concept homes, L-shaped kitchens | 💡 Use lazy Susans, ensure 18–24" clearance, use custom measurement service |
| Two-Tier Island with Differing Heights | High — complex joinery and structural engineering | Higher material & labour costs; requires precise installation | ⭐ High functionality + premium aesthetic | Luxury renovations, entertaining-focused kitchens | 💡 Contrast finishes (matte/high-gloss), separate task/ambient lighting, plan services |
| Waterfall Edge Island with Open Shelving | Medium–High — requires continuous countertop fabrication | Premium material cost (quartz/laminate); less hidden storage | ⭐ High visual impact; increases perceived value | Modern/minimalist condos and new builds | 💡 Use quartz or durable laminate, style shelves minimally, add LED strip lighting |
| Peninsula-to-Island Hybrid Design | Medium — custom configuration, ties into existing cabinetry | Uses more materials than single island; integrates appliances/storage | ⭐ Versatile: expands counter while retaining cabinetry connection | Kitchens adapting to existing footprints | 💡 Match cabinetry finishes, plan plumbing/electrical, seat on island side only |
| Narrow Prep-Only Island with Appliance Integration | High — requires electrical/ventilation and certified installers | High resource demand for appliances and ventilation | ⭐ Professional prep zone; premium but specialized | High-end lofts, entertaining kitchens with limited space | 💡 Coordinate licensed electrician/HVAC, use heat-resistant HDF/laminate, allow clearance either side |
| Curved or Soft-Edge Island for Safety and Flow | Medium–High — custom curved fabrication and doors | Slightly higher cost; efficient traffic flow and safer circulation | ⭐ Family-friendly: safer, organic aesthetic | Family homes, child-safe renovations, tight circulation areas | 💡 Specify custom curved doors, choose soft light colours and rounded countertop edges |
Your Perfect Small Kitchen Awaits
The journey through various kitchen designs for small kitchens with islands has revealed a powerful truth: a compact footprint is not a barrier to functionality, style, or efficiency. In fact, the constraints of a smaller space often inspire the most innovative and personalized solutions. The belief that an island is a luxury reserved only for sprawling kitchens is a myth we can confidently dispel.
We've explored a diverse palette of options, from the ultimate flexibility of a mobile island on casters to the seamless, modern aesthetic of a waterfall edge island. Each design serves as a testament to strategic thinking. The key takeaway is that the most successful small kitchen island is one that is meticulously planned, multifunctional, and perfectly scaled to its environment. It's not just about adding a counter; it's about creating a central hub that enhances how you live, cook, and connect in your home.
Recapping the Blueprint for Success
Mastering the art of integrating an island into a small kitchen hinges on a few core principles we've discussed. These are the non-negotiables that transform a potentially cramped space into a highly functional and inviting one.
- Circulation is King: The most critical element is maintaining adequate clearance. Adhering to the recommended 36 to 42 inches of walkway space around the island ensures your kitchen remains a place of easy movement, not a frustrating obstacle course.
- Multifunctionality is Mandatory: In a small kitchen, every component must work harder. Your island should be a powerhouse of utility, combining prep space with storage, seating, or even appliance integration. A design that only serves one purpose is a missed opportunity.
- Scale and Proportion are Everything: A bulky, oversized island will dominate a small room. Opt for slender profiles, clever shapes like curved edges, or narrow, prep-focused designs that respect the room's dimensions and enhance visual flow.
- Material and Colour Choices Matter: As we saw, light-coloured finishes, reflective surfaces, and materials like painted real wood or durable HDF can make a space feel larger and more open. Thoughtful material selection is a powerful tool for visual expansion.
For homeowners in the Greater Toronto Area, particularly in the condensed layouts of Toronto condos and Markham townhouses, these principles are especially relevant. Your challenge is to maximize every square foot, and the right island design, built with quality materials, is a cornerstone of that strategy.
Your Actionable Path Forward
The ideas presented in this guide are your starting point, not your final destination. The next step is to translate this inspiration into a tangible plan tailored to your unique space and lifestyle. Begin by measuring your kitchen meticulously. Sketch out your existing layout and experiment with placing different island shapes and sizes, always keeping those crucial circulation paths in mind.
Think critically about your daily routines. Are you an avid baker who needs more prep surface? Do you entertain often and require casual seating? Does your kitchen lack sufficient storage for pots and pans? Your answers will directly inform the features your island needs to incorporate.
Ultimately, creating the perfect small kitchen is about making deliberate, informed choices. By embracing creative layouts, prioritizing multifunctionality, and selecting materials that are both beautiful and durable, you can craft a space that feels expansive, works efficiently, and truly reflects your personal style. The small kitchen with an island is no longer a design paradox; it's a proven, achievable goal.
Ready to bring your vision to life? The experts at MapleKing Kitchen Cabinets specialize in creating custom cabinetry solutions perfect for the unique challenges of small kitchens in the Toronto and Markham area. Their factory-direct model provides premium, durable materials and bespoke designs for your island and surrounding cabinetry, ensuring a perfect fit without the luxury price tag. Visit MapleKing Kitchen Cabinets to book a free consultation and explore the possibilities for your home.



